08.SpringCloud之Bus
一.簡介
SpringCloudBus是SpringCloud的訊息匯流排,通過訊息元件代理各個連線分佈點,當組態檔發生變化後可以通過SpringCloudBus實現設定資訊動態抓取,實現設定項的動態更新。
二.實現
1.SpringCloudConfigServer和需要動態抓取設定的服務都增加依賴庫
<dependency>
   <groupId>org.springframework.cloud</groupId>
   <artifactId>spring-cloud-starter-bus-amqp</artifactId>
</dependency>
<dependency>
   <groupId>org.springframework.boot</groupId>
   <artifactId>spring-boot-starter-actuator</artifactId>
</dependency>
2.設定SpringCloudConfigServer
server:
  port: 8501


spring:
  application:
    name: config-server
  cloud:
    config:
      server:
        git:
          uri: https://gitee.com/vincent-java-test/spring-cloud-profiles.git
          username: xxxxxx@163.com
          password: xxxxxx
  rabbitmq:
    host: localhost
    port: 5672
    username: admin
    password: admin

eureka:
  client:
    service-url:
      defaultZone: http://localhost:7001/service-eureka/eureka

management:
  security:
    #禁用actuator安全校驗
    enabled: false
3.啟動SpringCloudConfigServer,並存取http://localhost:15672
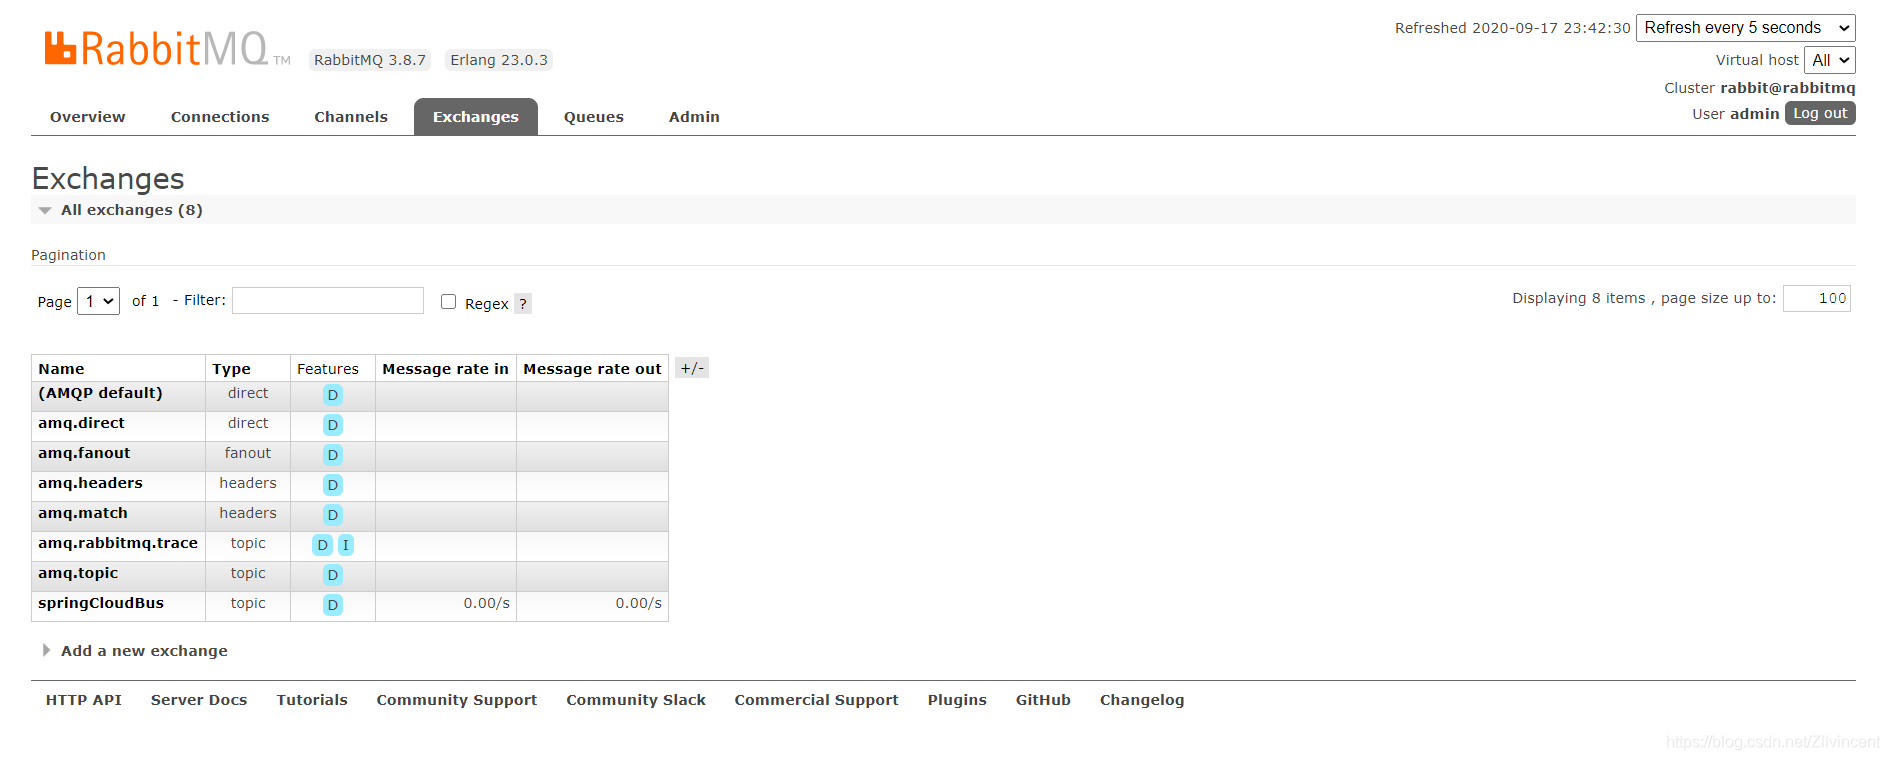
SpringCloudConfig服務啟動後將會在RabbitMQ中新建springCloudBus名稱的topic Exechange。
檢視SpringCloudConfig 佇列詳情可知routing key 為#。
4.設定service-user微服務的bootstrap.yml
spring:
  cloud:
    config:
      label: master
      name: service-user
      profile: prod
      discovery:
        enabled: true
        service-id: config-server

eureka:
  client:
    service-url:
      defaultZone: http://localhost:7001/service-eureka/eureka

management:
  security:
    enabled: false
5.設定service-user微服務的application.yml,並推播到git
server:
  port: 8001
  context-path: /service-user

spring:
  application:
    name: service-user

  rabbitmq:
    host: localhost
    port: 5672
    username: admin
    password: admin


application:
  version: 1.0.0
6.把service-user微服務動態更新內容注入容器
package com.vincent.component;

import lombok.Data;
import org.springframework.beans.factory.annotation.Value;
import org.springframework.cloud.context.config.annotation.RefreshScope;
import org.springframework.stereotype.Component;


@Data
@Component
@RefreshScope
public class RefreshComponent {
    @Value("${application.version}")
    private String version;
}
@RefreshScope 標註的類表示需要動態更新。
7.編寫service-user微服務Controller返回RefreshCompnent資訊
package com.vincent.controller;

import com.alibaba.fastjson.JSONObject;
import com.vincent.component.RefreshComponent;
import org.springframework.beans.factory.annotation.Autowired;
import org.springframework.web.bind.annotation.GetMapping;
import org.springframework.web.bind.annotation.RestController;

import javax.servlet.http.HttpServletRequest;
import java.util.Date;

@RestController
public class UserController {
    @Autowired
    private RefreshComponent refreshComponent;


    @GetMapping("/detail")
    public Object detail(Integer id, HttpServletRequest request){
        JSONObject rst = new JSONObject();
        rst.put("date",new Date());
        rst.put("version",this.refreshComponent.getVersion());
        return rst;
    }
}
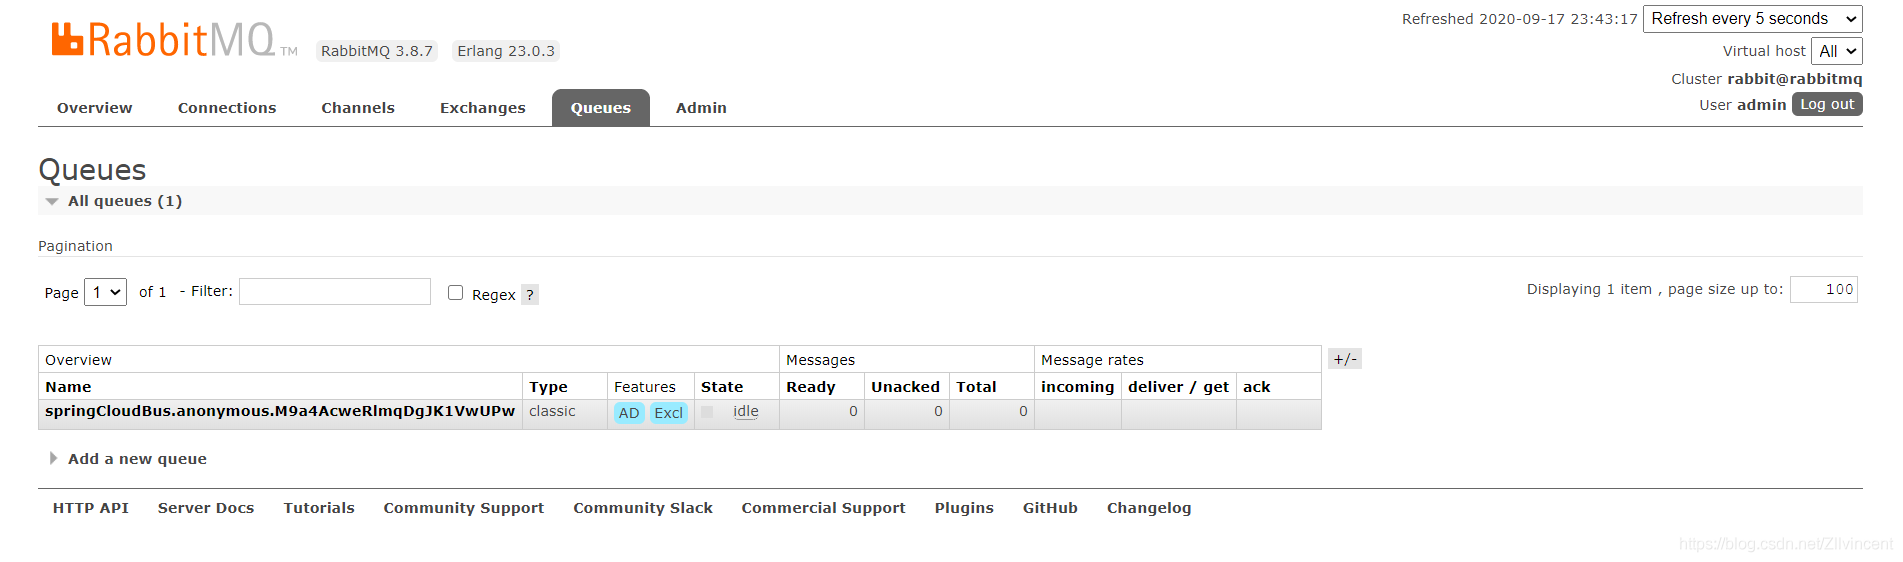
8.啟動service-user微服務,檢視RabbitMQ中Queues將可以看到多了一個佇列
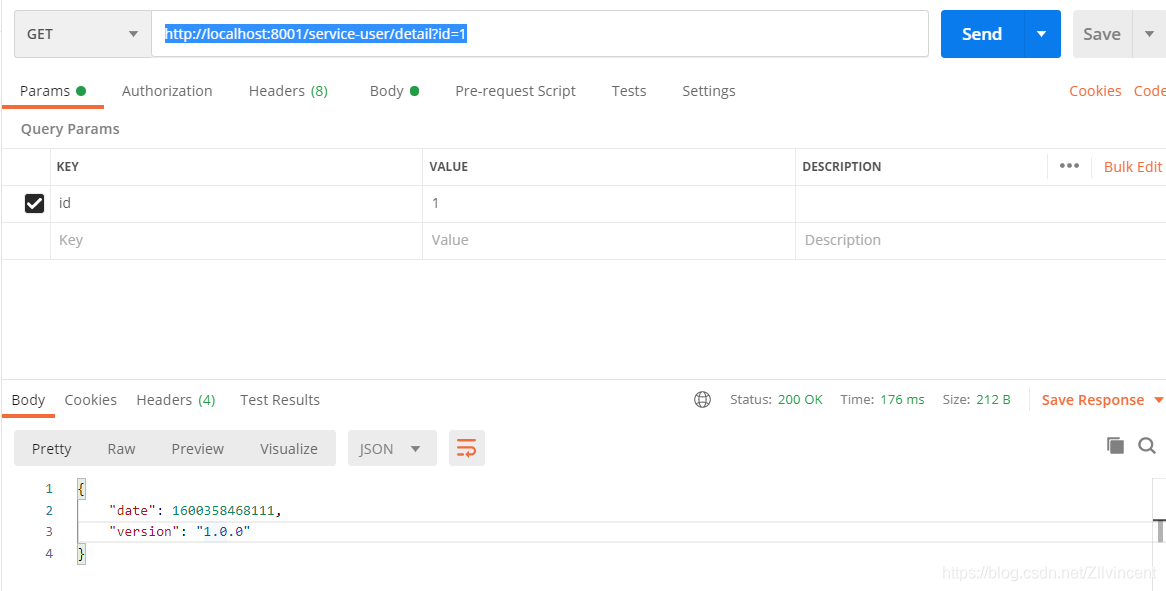
9.存取service-user微服務,http://localhost:8001/service-user/detail?id=1
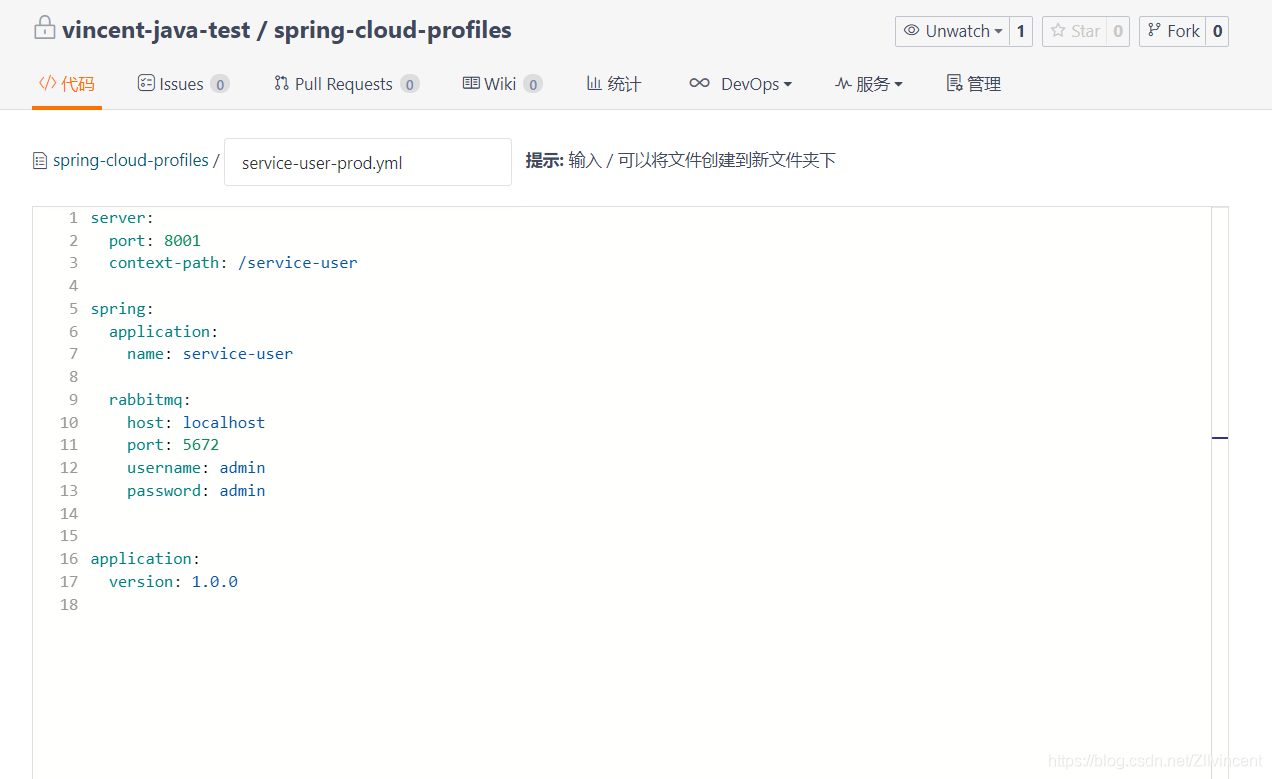
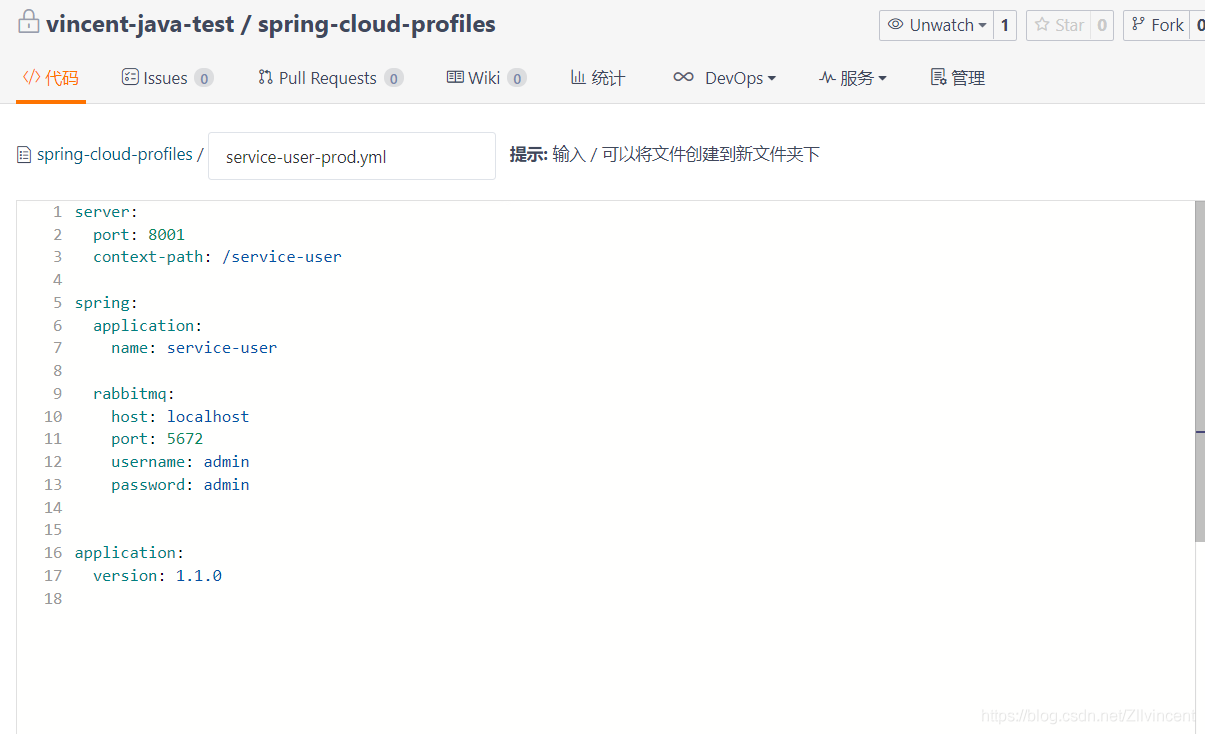
10.修改service-user-prod.yml組態檔,並提交到git伺服器
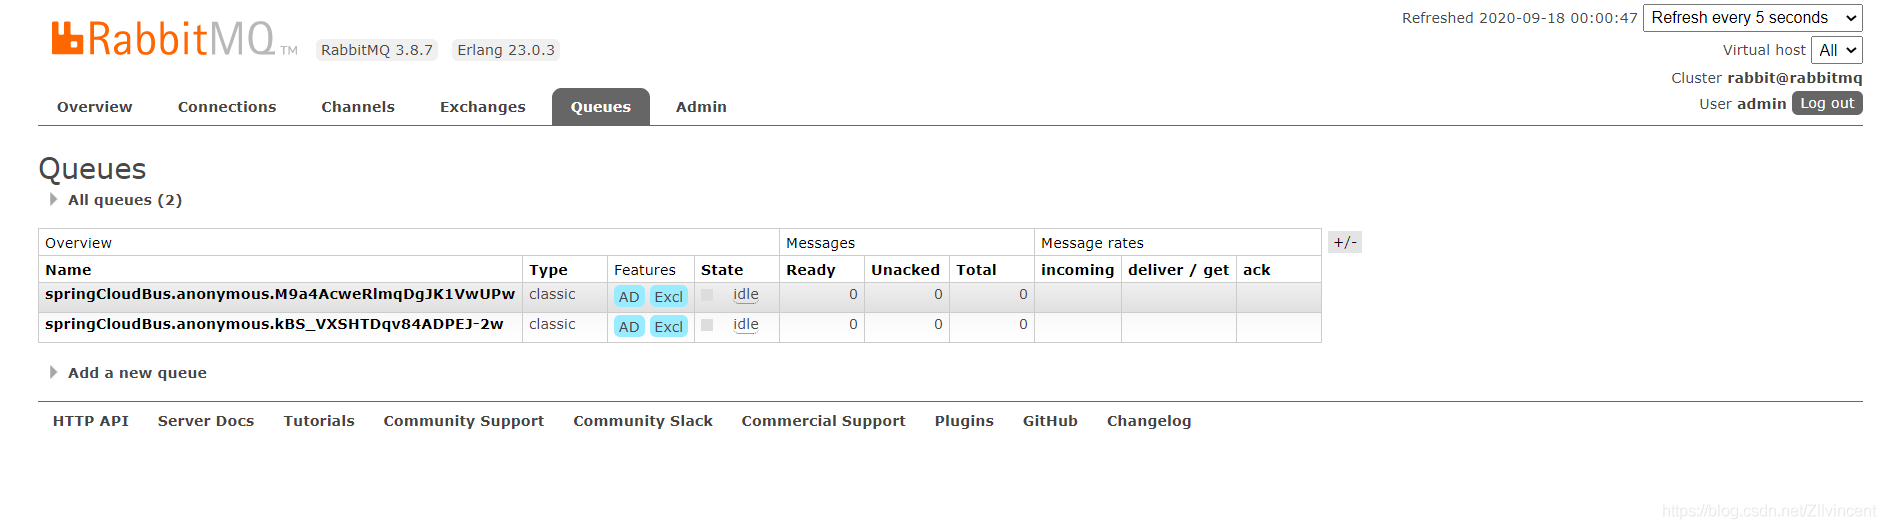
11.通過POST方式存取http://localhost:8501/bus/refresh,重新整理設定服務SpringCloudConfigServer
12.再次存取service-user微服務,http://localhost:8001/service-user/detail?id=1
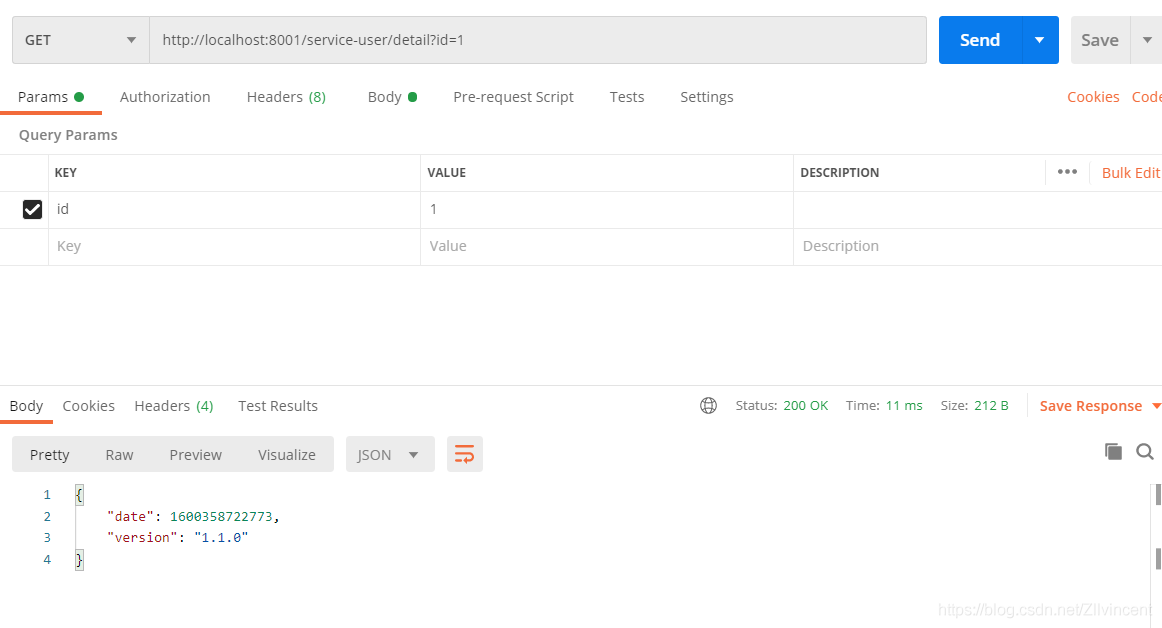
動態抓取設定資訊成功。
三.總結
SpringCloud通過訊息元件代理(如RabbitMQ) 連線各個分佈點,通過Topic方式實現組態檔動態抓取更新。