智慧疫情防控平臺(圖形化程式設計mind+)
本文系湛江市第十七中學星火創客團隊及嶺南師範學院物聯網俱樂部原創部分參賽專案,轉載請保留宣告。
前言
本文章將教會大家如何使用圖形化程式設計製作簡易的智慧疫情防控平臺,這個專案非常適合於低年級的學生去實踐,鍛鍊自己的邏輯思維和積累一定的專案開發經驗。
一、目標實現
基於DS18B20或LM35實現測溫
基於二哈實現多人人臉學習和識別
基於TinywebDB實現雲資料庫應用
基於EasyIoT實現mqtt資料上傳
二、前期準備:
軟體準備:Mind+
硬體準備:掌控板、拓展板、二哈識圖、溫度感測器
如果各位看官有錢,可用mlx90614等專業的紅外測溫模組等專業模組替代ds18b20或LM35
硬體購買連結如下:
①掌控板
②二哈識圖
③DS18B20模組
④mlx90614紅外測溫感測器模組
⑤LM35測溫模組
三、搭建微型資料庫(TinywebDB)
連結為:http://tinywebdb.appinventor.space/login
(1)註冊一個賬號,再進行登入
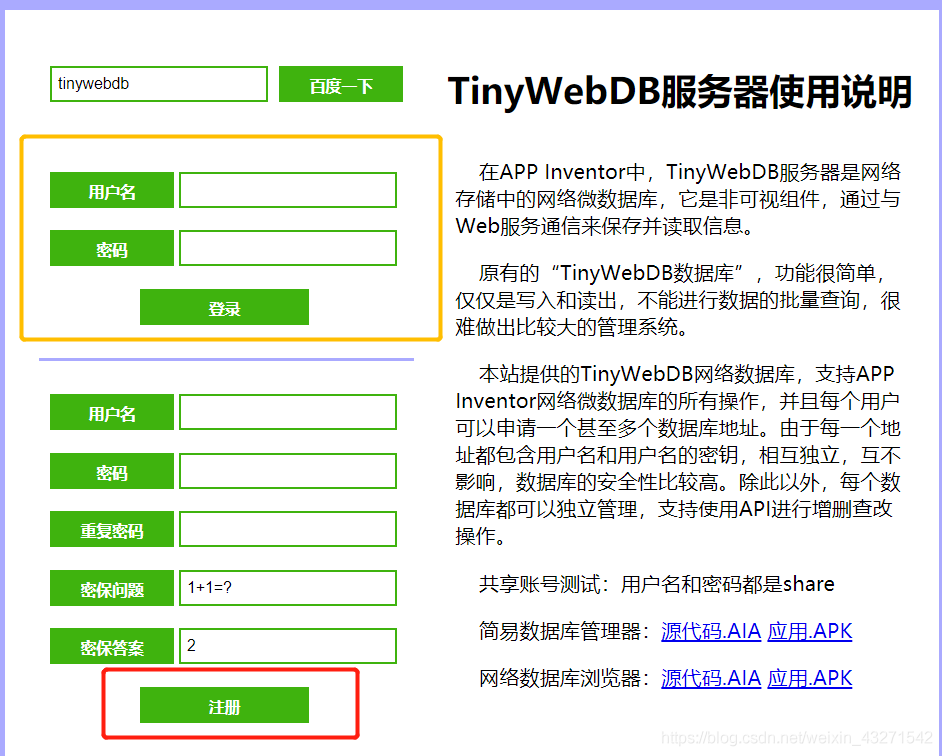
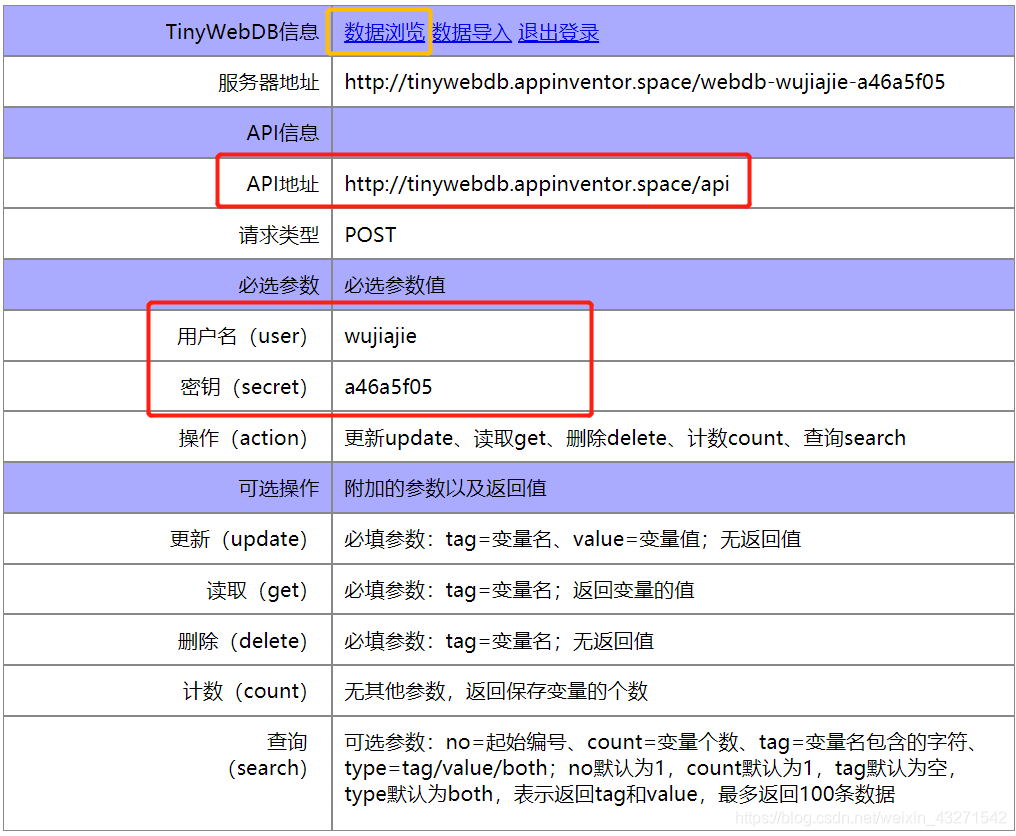
(2)登入進去以後記錄API地址、使用者名稱、金鑰,然後點選進入到資料瀏覽
(3)新增標籤和值(如:1 學號+姓名)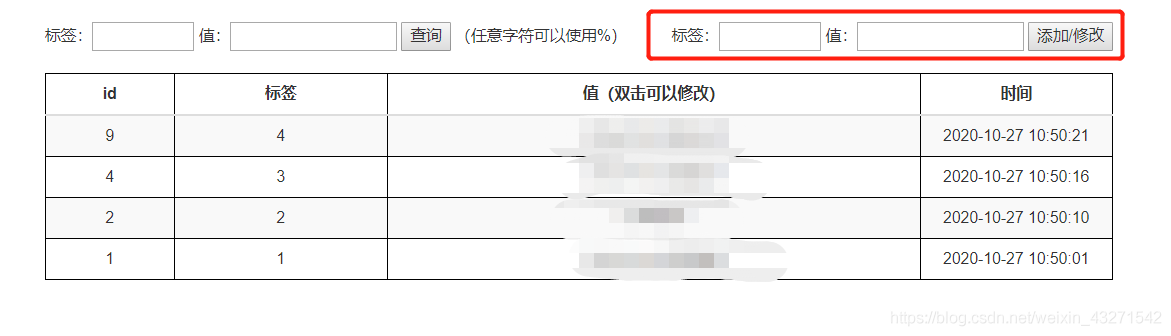
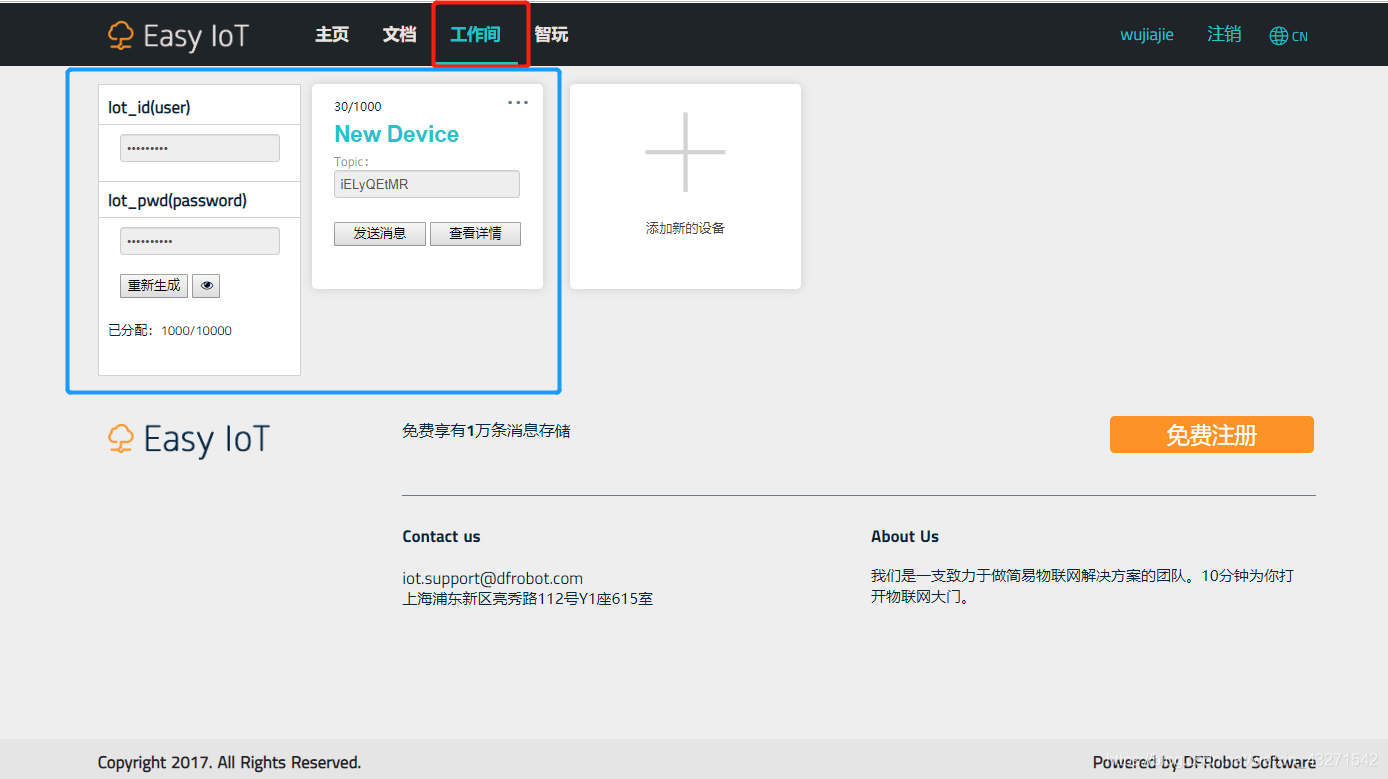
四、設定Easy-iot
連結:http://iot.dfrobot.com.cn/
(1)註冊Easy-iot賬號並且登入
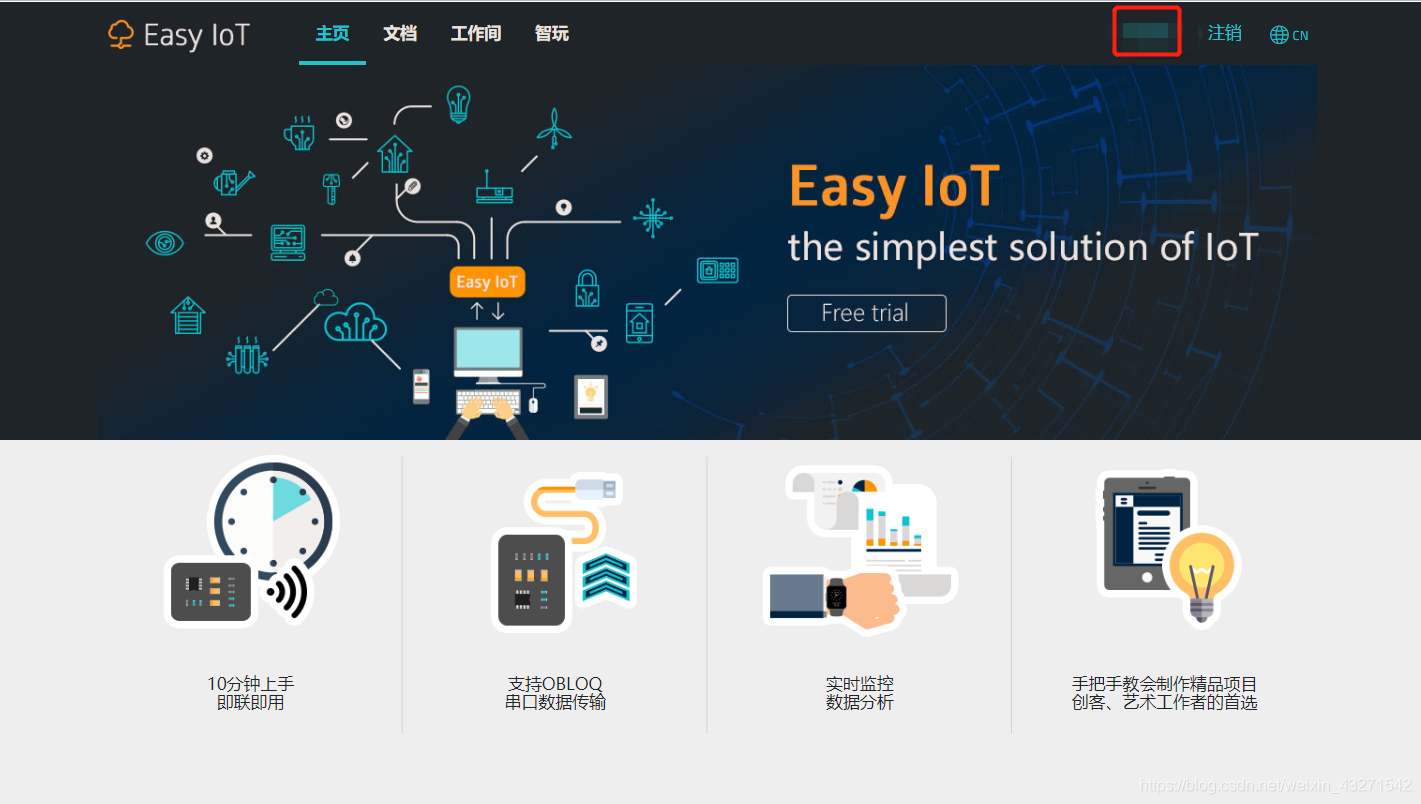
(2)選擇工作間,記錄user、password、Topic
五、接線
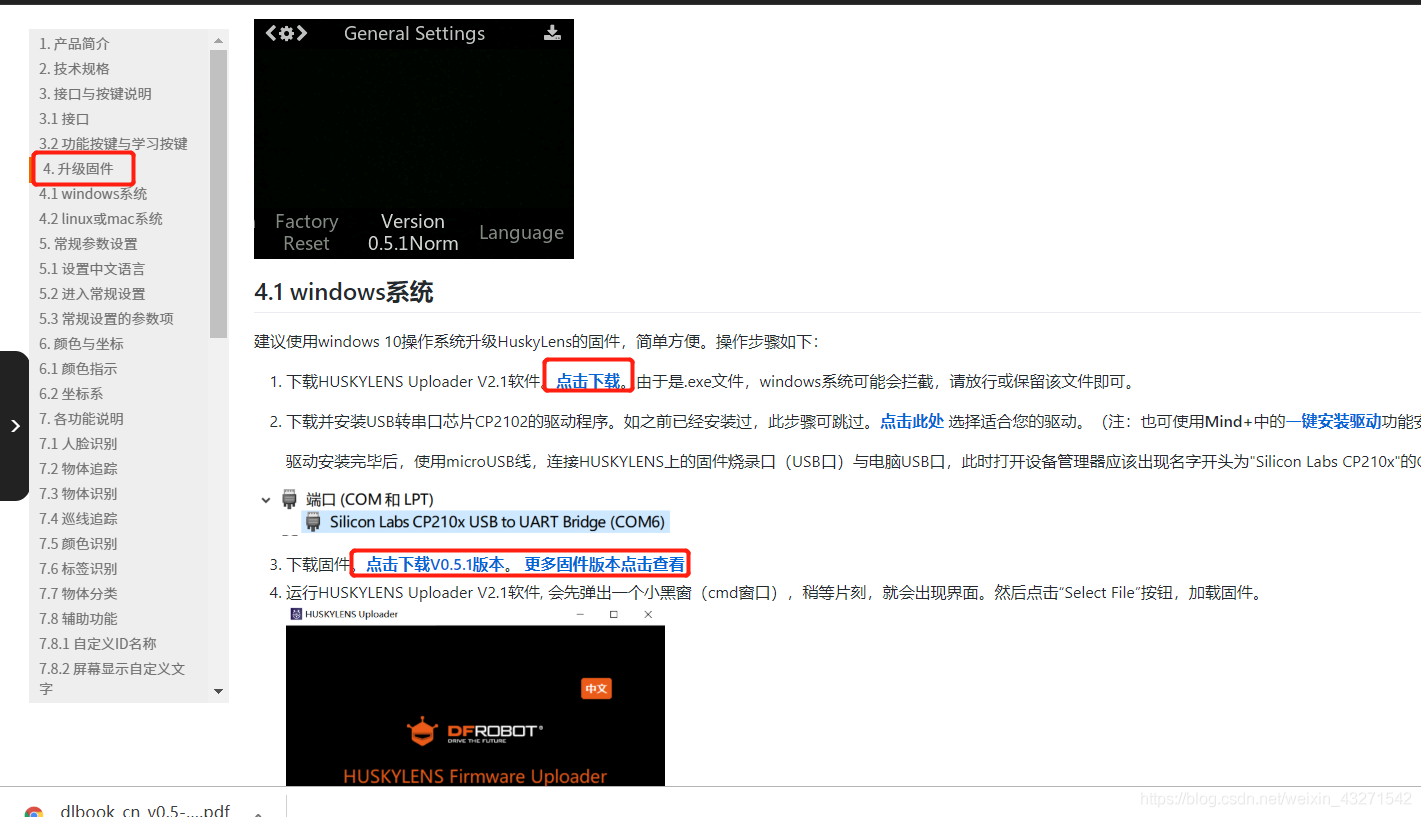
(1)接線前需要升級二哈韌體(提供產品維庫地連結給大家,請仔細看完,這樣才能熟悉掌握使用二哈。人臉抓拍地使用在產品維庫都有,這裡就不一一介紹了)
連結:https://wiki.dfrobot.com.cn/SKU_SEN0305_Gravity__HUSKYLENS%E4%BA%BA%E5%B7%A5%E6%99%BA%E8%83%BD%E6%91%84%E5%83%8F%E5%A4%B4#target_5
魔鏡專案連結:https://mc.dfrobot.com.cn/thread-306224-1-1.html?fromuid=727937
(2)掌控板與拓展板進行連線(掌控版螢幕對準拓展板有中文這一方)
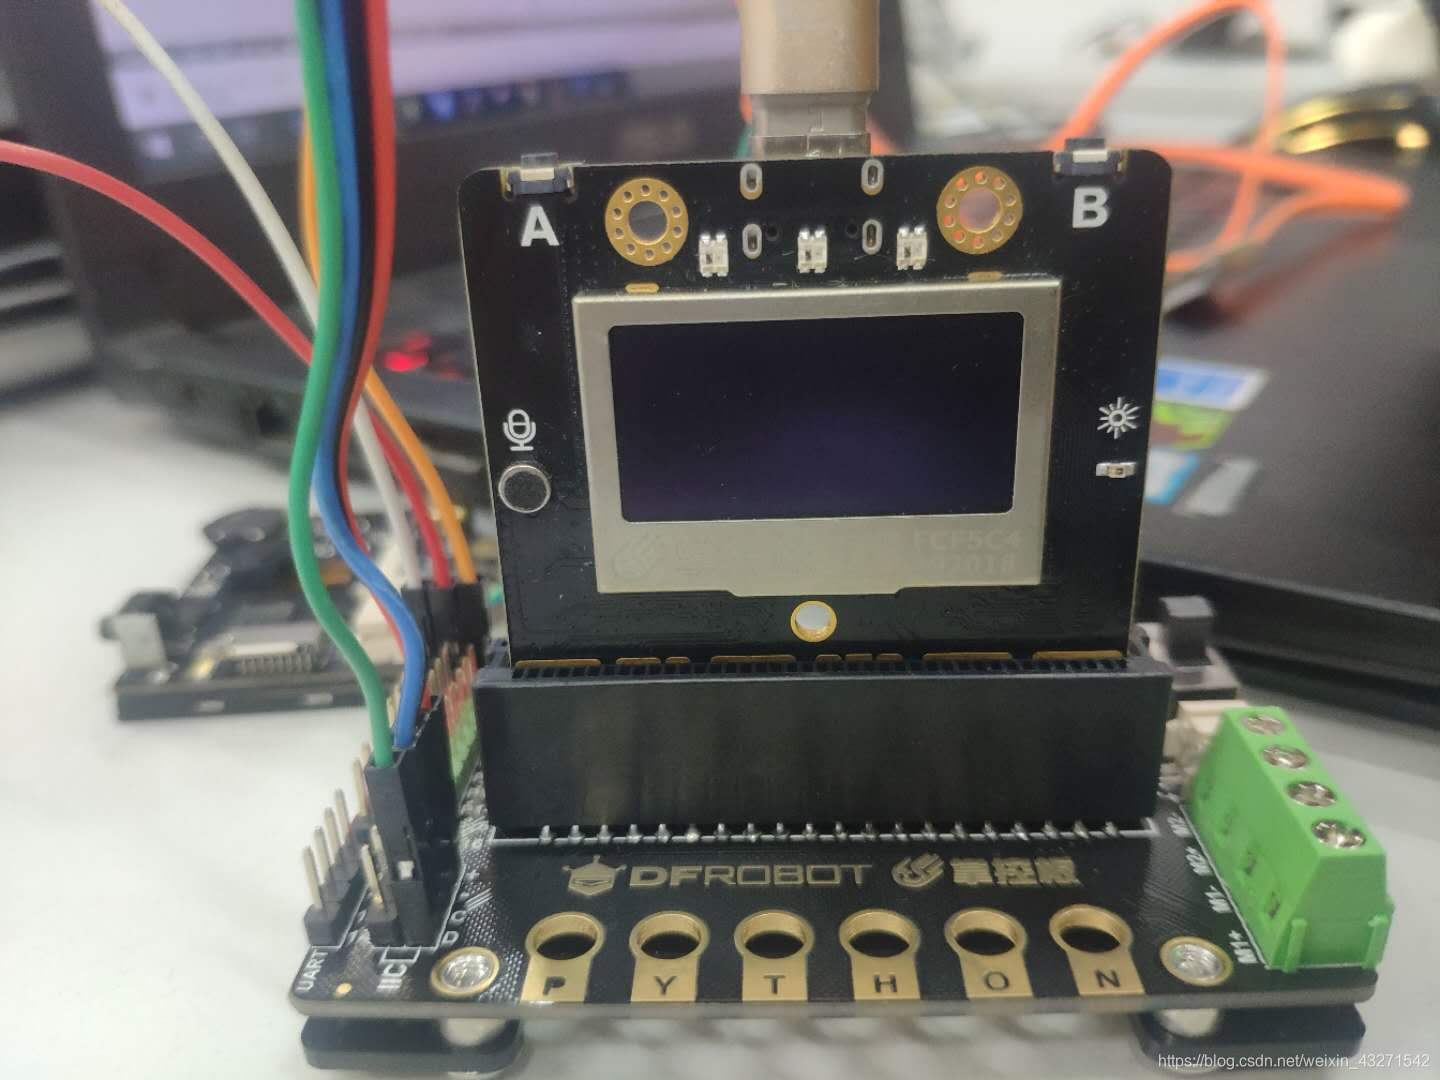
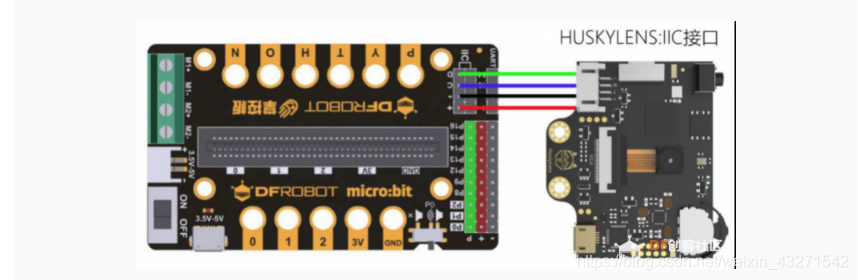
(3)拓展板與二哈識圖連線
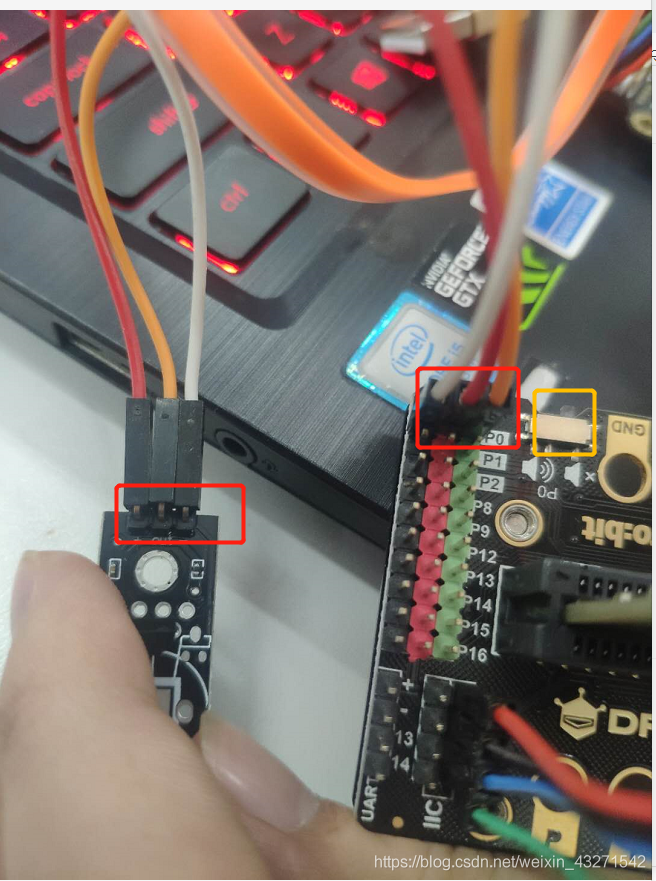
(4)溫度感測器與拓展板連線(音量鍵得關閉,否則會佔用P0埠)
六、燒寫程式碼
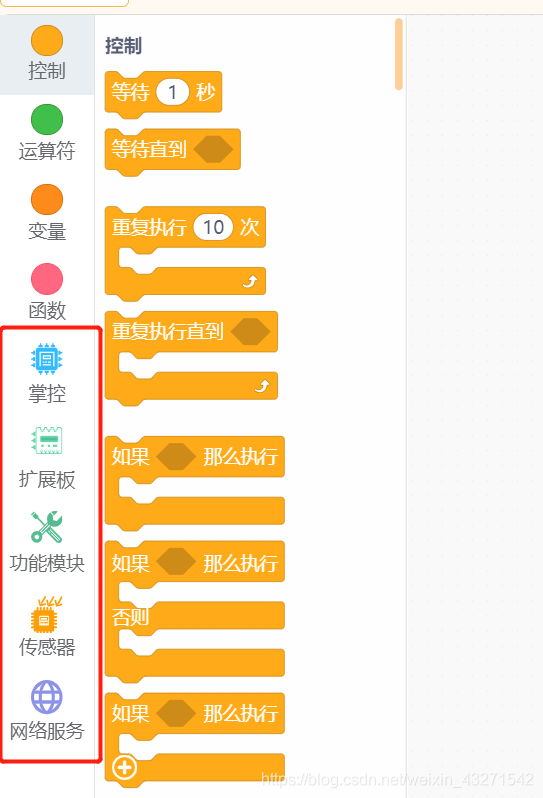
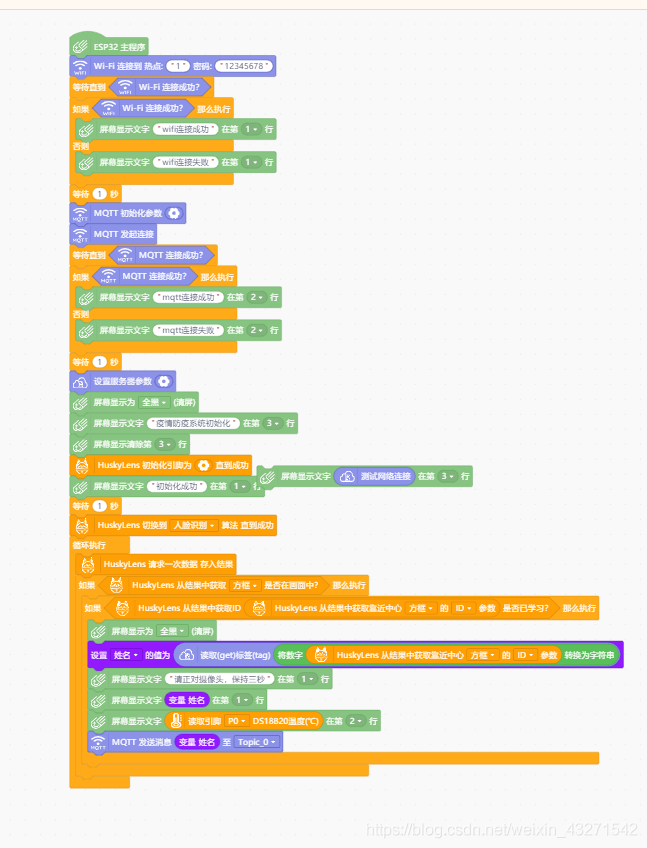
(1)影象化程式設計
(2)arduino C
/*!
 * MindPlus
 * mpython
 *
 */
#include <MPython.h>
#include <DFRobot_Iot.h>
#include <DFRobot_DS18B20.h>
#include <mPython_tinywebdb.h>
#include <DFRobot_HuskyLens.h>

// 動態變數
String mind_s_XingMing;
// 靜態常數
const String topics[5] = {"iELyQEtMR","","","",""};
// 建立物件
DFRobot_Iot       myIot;
mPython_TinyWebDB mydb;
DFRobot_HuskyLens huskylens;
DFRobot_DS18B20   ds18b20_P0;


// 主程式開始
void setup() {
	mPython.begin();
	ds18b20_P0.begin(P0);
	myIot.wifiConnect("1", "12345678");
	while (!myIot.wifiStatus()) {yield();}
	if (myIot.wifiStatus()) {
		display.setCursorLine(1);
		display.printLine("wifi連線成功");
	}
	else {
		display.setCursorLine(1);
		display.printLine("wifi連線失敗");
	}
	delay(1000);
	myIot.init("iot.dfrobot.com.cn","i97ywPpMR","","ir7sQEtGgz",topics,1883);
	myIot.connect();
	while (!myIot.connected()) {yield();}
	if (myIot.connected()) {
		display.setCursorLine(2);
		display.printLine("mqtt連線成功");
	}
	else {
		display.setCursorLine(2);
		display.printLine("mqtt連線失敗");
	}
	delay(1000);
	mydb.setServerParameter("http://tinywebdb.appinventor.space/api", "wujiajie","a46a5f05");
	display.fillScreen(0);
	display.setCursorLine(3);
	display.printLine("疫情防疫系統初始化");
	display.fillInLine(3, 0);
	huskylens.beginI2CUntilSuccess();
	display.setCursorLine(1);
	display.printLine("初始化成功");
	delay(1000);
	huskylens.writeAlgorithm(ALGORITHM_FACE_RECOGNITION);
}
void loop() {
	huskylens.request();
	if (huskylens.isAppearDirect(HUSKYLENSResultBlock)) {
		if (huskylens.isLearned(huskylens.readBlockCenterParameterDirect().ID)) {
			display.fillScreen(0);
			mind_s_XingMing = mydb.getTag((String(huskylens.readBlockCenterParameterDirect().ID)));
			display.setCursorLine(1);
			display.printLine("請正對攝像頭,保持三秒");
			display.setCursorLine(1);
			display.printLine(mind_s_XingMing);
			display.setCursorLine(2);
			display.printLine(ds18b20_P0.getTempC());
			myIot.publish(topic_0, mind_s_XingMing);
		}
	}
}
Gitee原始碼倉庫:https://gitee.com/qiqicancanqiqi/graphic-programming/commit/9ee4bd0417e4904f8fc12c95bb8310aa0be9b4e2
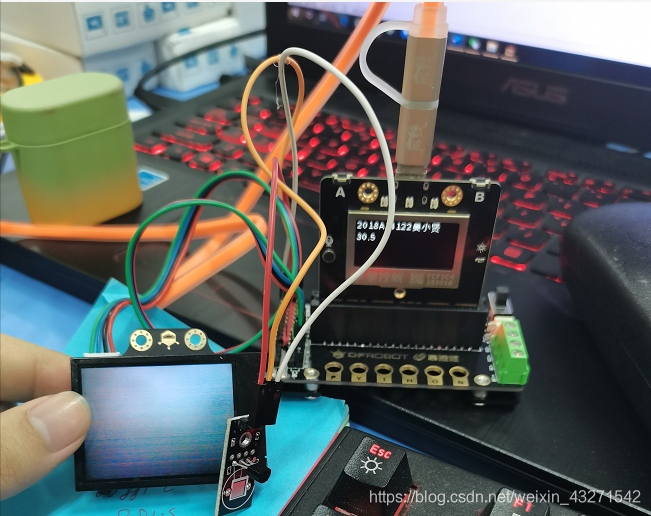
七、實現效果圖
總結
這個小專案,運用到了比較多的知識如:wifi無線傳輸、MQTT協定、建立微型資料庫、對接Easy-Iot(也可以是阿里雲)、掌控板的使用、拓展板的使用、二哈識圖的使用。希望缺乏專案開發經驗的小夥伴,多去實踐、多去思考、多去總結,這樣才能更大程度提高自己。