Thymeleaf+SpringMVC5範例
Thymeleaf是一個java模板引擎,它在獨立和Web應用程式中處理六種模板(HTML,CSS,TEXT,JAVASCRIPT,CSS和RAW)。
在這篇文章中,我們來學習如何在Spring MVC應用程式中組態Thymeleaf模板。
本例中使用的工具和技術是 -
- Spring MVC 5.0.3.RELEASE
- Servlet API 4.0.0
- Thymeleaf 3.0.9.RELEASE
- Java SE 8
- Maven 3.5.2
- Jetty Maven plugin 9.4.8
- Eclipse Oxygen.2 Release (4.7.2)
下面將要編寫一個簡單的Spring MVC應用程式,它將列印輸出「Hello Spring MVC 5!」。
第1步 - 使用Maven建立Web專案
首先,用war包裝建立一個maven專案。可以參考這篇文章來學習 - 如何在Eclipse IDE中建立一個Maven Web應用程式。
應用程式的最終專案結構如下所示 -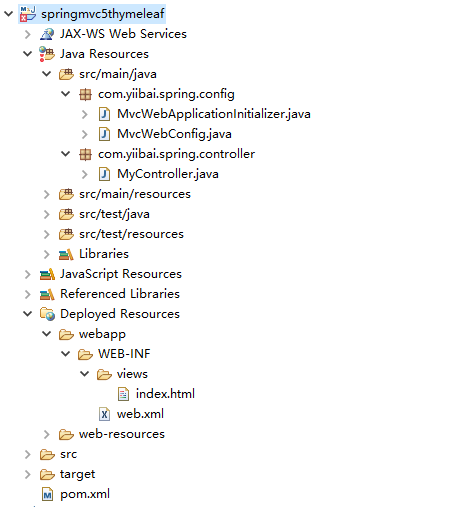
第2步 - 新增Jar依賴關係
要在Spring MVC應用程式中使用Thymeleaf,需要新增thymeleaf-spring5作為類路徑的依賴關係。
開啟Maven專案中的pom.xml檔案,並在其中新增以下jar包依賴項。
<project xmlns="http://maven.apache.org/POM/4.0.0" xmlns:xsi="http://www.w3.org/2001/XMLSchema-instance"
    xsi:schemaLocation="http://maven.apache.org/POM/4.0.0 http://maven.apache.org/xsd/maven-4.0.0.xsd">
    <modelVersion>4.0.0</modelVersion>
    <groupId>com.yiibai</groupId>
    <artifactId>springmvc5thymeleaf</artifactId>
    <version>0.0.1-SNAPSHOT</version>
    <packaging>war</packaging>
    <name>Spring MVC - Thymeleaf Integration example</name>

    <properties>
        <failOnMissingWebXml>false</failOnMissingWebXml>
        <maven.compiler.source>8</maven.compiler.source>
        <maven.compiler.target>8</maven.compiler.target>
    </properties>

    <dependencies>
        <dependency>
            <groupId>org.springframework</groupId>
            <artifactId>spring-webmvc</artifactId>
            <version>5.0.3.RELEASE</version>
        </dependency>
        <dependency>
            <groupId>org.thymeleaf</groupId>
            <artifactId>thymeleaf-spring5</artifactId>
            <version>3.0.9.RELEASE</version>
        </dependency>
        <dependency>
            <groupId>javax.servlet</groupId>
            <artifactId>javax.servlet-api</artifactId>
            <version>4.0.0</version>
            <scope>provided</scope>
        </dependency>
    </dependencies>
    <build>
        <plugins>
            <!-- Embedded Apache Tomcat required for testing war -->

            <plugin>
            <groupId>org.eclipse.jetty</groupId>
            <artifactId>jetty-maven-plugin</artifactId>
            <version>9.4.8.v20171121</version>
         </plugin>
        </plugins>
    </build>
</project>
第3步 - Spring MVC組態
在com.yiibai.spring.config包下建立一個名為MvcWebConfig的@Configuration類。
要在Spring MVC中註冊Thymeleaf檢視,需要按如下方式定義SpringResourceTemplateResolver和SpringTemplateEngine bean方法,如下 -
檔案: MvcWebConfig.java -
package com.yiibai.spring.config;

import org.springframework.beans.factory.annotation.Autowired;
import org.springframework.context.ApplicationContext;
import org.springframework.context.annotation.Bean;
import org.springframework.context.annotation.ComponentScan;
import org.springframework.context.annotation.Configuration;
import org.springframework.web.servlet.config.annotation.EnableWebMvc;
import org.springframework.web.servlet.config.annotation.ViewResolverRegistry;
import org.springframework.web.servlet.config.annotation.WebMvcConfigurer;
import org.thymeleaf.spring5.SpringTemplateEngine;
import org.thymeleaf.spring5.templateresolver.SpringResourceTemplateResolver;
import org.thymeleaf.spring5.view.ThymeleafViewResolver;

@Configuration
@EnableWebMvc
@ComponentScan("com.yiibai.spring.controller")
public class MvcWebConfig implements WebMvcConfigurer {

   @Autowired
   private ApplicationContext applicationContext;

   /*
    * STEP 1 - Create SpringResourceTemplateResolver
    * */
   @Bean
   public SpringResourceTemplateResolver templateResolver() {
      SpringResourceTemplateResolver templateResolver = new SpringResourceTemplateResolver();
      templateResolver.setCharacterEncoding("UTF-8");
      templateResolver.setApplicationContext(applicationContext);
      templateResolver.setPrefix("/WEB-INF/views/");
      templateResolver.setSuffix(".html");
      return templateResolver;
   }

   /*
    * STEP 2 - Create SpringTemplateEngine
    * */
   @Bean
   public SpringTemplateEngine templateEngine() {
      SpringTemplateEngine templateEngine = new SpringTemplateEngine();
      templateEngine.setTemplateResolver(templateResolver());
      templateEngine.setEnableSpringELCompiler(true);

      return templateEngine;
   }

   /*
    * STEP 3 - Register ThymeleafViewResolver
    * */
   @Override
   public void configureViewResolvers(ViewResolverRegistry registry) {
      ThymeleafViewResolver resolver = new ThymeleafViewResolver();
      resolver.setTemplateEngine(templateEngine());
      registry.viewResolver(resolver);
   }

}
WebMvcConfigurer介面提供了用於為Spring MVC應用程式客製化基於java的組態的預設方法。
@EnableWebMvc注釋用於從WebMvcConfigurationSupport(基於Java的MVC組態背後的主類)匯入Spring MVC組態。
@ComponentScan掃描basePackages屬性指定的包中的構造型注釋(@Controller,@Service等等)。
SpringResourceTemplateResolver與Spring自己的資源解析基礎結構整合。可以使用它來指定模板的位置,模板的模式,快取過期的TTL等。
SpringTemplateEngine使用SpringStandardDialect,並支援Spring自己的MessageSource訊息解析機制解析機制。
在Spring MVC中,需要宣告和對映DispatcherServlet,以便使用java或web.xml組態來處理所有請求。
在Servlet 3.0+環境中,可以使用AbstractAnnotationConfigDispatcherServletInitializer類以程式設計方式註冊和初始化DispatcherServlet,檔案:MvcWebApplicationInitializer.java -
package com.yiibai.spring.config;

import org.springframework.web.servlet.support.AbstractAnnotationConfigDispatcherServletInitializer;

public class MvcWebApplicationInitializer extends AbstractAnnotationConfigDispatcherServletInitializer {

   @Override
   protected Class<?>[] getRootConfigClasses() {
      return null;
   }

   @Override
   protected Class<?>[] getServletConfigClasses() {
      return new Class[] { MvcWebConfig.class };
   }

   @Override
   protected String[] getServletMappings() {
      return new String[] { "/" };
   }

}
第4步 - 建立Thymeleaf模板/檢視
在src/main/webapp/WEB-INF/views檔案夾下建立一個index.html檔案,並在其中寫入以下程式碼。
<!DOCTYPE html>
<html xmlns:th="http://www.thymeleaf.org">
<head>
<meta charset="UTF-8">
<title>SpringMVC5+Thymeleaf範例</title>
</head>
<body>
    <h1>Spring MVC + Thymeleaf Hello World example</h1>
    <p th:text="${message}"></p>
</body>
</html>
屬性th:text =""被稱為標準方言,用${...}標準表示式來評估物件。
第5步 - 建立控制器
在com.yiibai.spring.controller包下建立一個@Controller類,並在其中寫入下面的程式碼,檔案:MyController.java -
package com.yiibai.spring.controller;

import org.springframework.stereotype.Controller;
import org.springframework.ui.Model;
import org.springframework.web.bind.annotation.GetMapping;

@Controller
public class MyController {

   @GetMapping("/")
   public String index(Model model) {
      model.addAttribute("message", "Hello Spring MVC 5!");
      return "index";
   }
}
第6步 - 執行應用程式
使用以下maven命令來執行您的應用程式。
mvn jetty:run(該命令從其原始碼部署webapp,而不是構建war)。
在瀏覽器的位址列中輸入:http:// localhost:8080 來測試應用程式。如果一切正常,應該會看到類似下面的頁面 -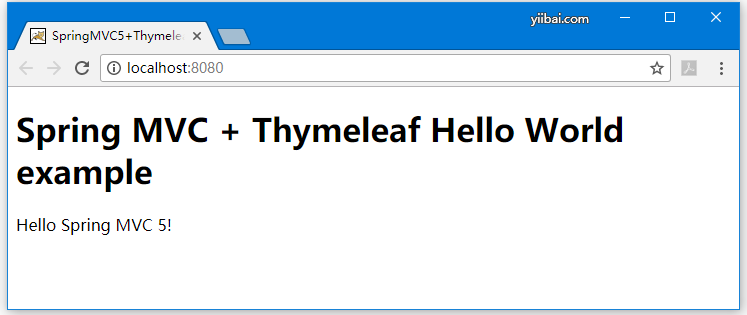
在接下來的Thymeleaf基礎標籤應用,大部分是基於此應用講解。