VueJS過渡和動畫
在本章中,我們將討論VueJS中可用的過渡和動畫功能。
過渡
當在DOM中新增/更新HTML元素時,VueJS提供了各種方法來將轉換應用到HTML元素。 VueJS有一個內建的轉換元件,可將其包裝轉換到元素中。
語法
<transition name = "nameoftransition">
   <div></div>
</transition>
下面通過一個例子來理解過渡的工作。
範例
建立一個檔案:transition.html -
<html>
   <head>
      <meta charset="UTF-8">
      <title>VueJS過渡範例</title>
      <script type = "text/javascript" src = "js/vue.js"></script>
   </head>
   <body>
      <style>
         .fade-enter-active, .fade-leave-active {
            transition: opacity 2s
         }
         .fade-enter, .fade-leave-to /* .fade-leave-active below version 2.1.8 */ {
            opacity: 0
         }
      </style>
      <div id = "databinding">
         <button v-on:click = "show = !show">點選我</button>
         <transition name = "fade">
            <p v-show = "show" v-bind:style = "styleobj">VueJS過渡範例</p>
         </transition>
      </div>
      <script type = "text/javascript">
         var vm = new Vue({
            el: '#databinding',
            data: {
               show:true,
               styleobj :{
                  fontSize:'20px',
                  color:'red'
               }
            },
            methods : {
            }
         });
      </script>
   </body>
</html>
有一個"點選我"的按鈕,使用它可以將變數show的值更改為false,反之亦然。 只有當變數為true時,才有一個p標籤顯示文字元素。下面的一段程式碼所示的過渡元素包裝了p標籤。
<transition name = "fade">
    <p v-show = "show" v-bind:style = "styleobj">VueJS過渡範例</p>
</transition>
過渡的名稱是fade。 VueJS為轉換提供了一些標準類,並且類以轉換的名稱作為字首。
以下是一些轉換的標準類 -
v-enter- 這個類在元素被更新/新增之前被初始呼叫。它為開始狀態。v-enter-active- 此類用於定義進入轉換階段的延遲,持續時間和緩動曲線。這是整個活動狀態,並且整個進入階段都是可用的。v-leave- 在離開轉換被觸發時新增,刪除。v-leave-active- 在離開階段應用。轉換完成後將被刪除。這個類用於在離開階段應用延遲,持續時間和緩和曲線。
上述每個類都將以轉換的名稱作為字首。將過渡的名稱作為fade,因此類的名稱變為.fade_enter,.fade_enter_active,.fade_leave,.fade_leave_active。
它們在下面的程式碼中定義 -
<style>
   .fade-enter-active, .fade-leave-active {
      transition: opacity 2s
   }
   .fade-enter, .fade-leave-to /* .fade-leave-active below version 2.1.8 */ {
      opacity: 0
   }
</style>
.fade_enter_active和.fade_leave_active一起定義,並在開始和離開階段應用轉換。 不透明屬性在2秒內變為0。
持續時間在.fade_enter_active和.fade_leave_active中定義。 最後一個階段是在.fade_enter,.fade_leave_to中定義的。
在瀏覽器顯示如下所示 -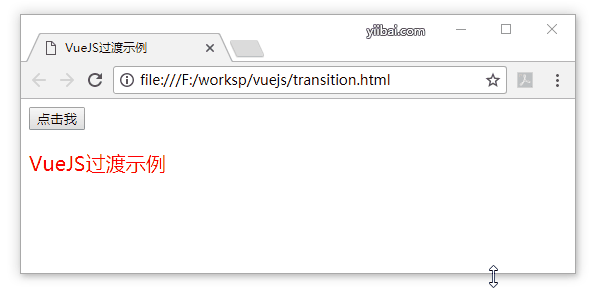
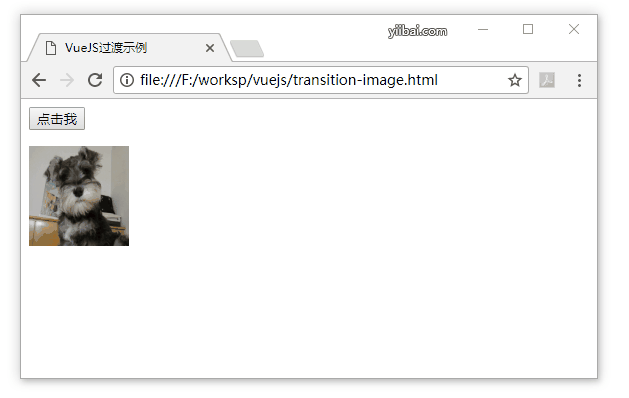
下面再來看看另外一個例子,其中有一個影象,當點選按鈕時,它在x軸上移動。建立一個檔案:transition-image.html -
<html>
   <head>
      <meta charset="UTF-8">
      <title>VueJS過渡範例</title>
      <script type = "text/javascript" src = "js/vue.js"></script>
   </head>
   <body>
      <style>
         .shiftx-enter-active, .shiftx-leave-active {
            transition: all 2s ease-in-out;
         }
         .shiftx-enter, .shiftx-leave-to /* .fade-leave-active below version 2.1.8 */ {
            transform :  translateX(100px);
         }
      </style>
      <div id = "databinding">
         <button v-on:click = "show = !show">點選我</button>
         <transition name = "shiftx">
            <p v-show = "show">
               <img src = "images/mydog.jpg" style = "width:100px;height:100px;" />
            </p>
         </transition>
      </div>
      <script type = "text/javascript">
         var vm = new Vue({
            el: '#databinding',
            data: {
               show:true
            },
            methods : {
            }
         });
      </script>
   </body>
</html>
過渡的名字是shiftx。 transform屬性用於使用下面的一段程式碼將x軸上的影象移動100px。
<style>
   .shiftx-enter-active, .shiftx-leave-active {
      transition: all 2s ease-in-out;
   }
   .shiftx-enter, .shiftx-leave-to /* .fade-leave-active below version 2.1.8 */ {
      transform :  translateX(100px);
   }
</style>
點選按鈕,影象將向右移動100px,如下圖所示 -
動畫
動畫以與轉換完成相同的方式應用。動畫也有類需要宣告效果發生。
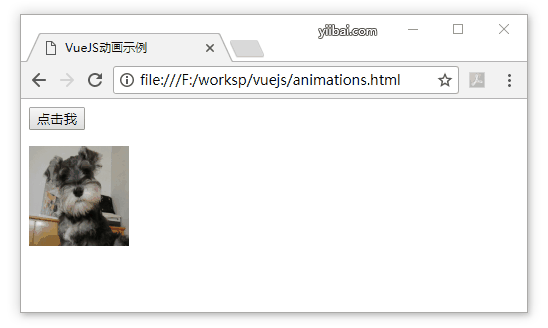
下面來看看一個例子,演示如何動畫是如何工作的。建立一個檔案:animations.html -
<html>
   <head>
   <meta charset="utf-8" />
      <title>VueJS動畫範例</title>
      <script type = "text/javascript" src = "js/vue.js"></script>
   </head>
   <body>
      <style>
         .shiftx-enter-active {
            animation: shift-in 2s;
         }
         .shiftx-leave-active {
            animation: shift-in 2s reverse;
         }
         @keyframes shift-in {
            0%   {transform:rotateX(0deg);}
            25%  {transform:rotateX(90deg);}
            50%  {transform:rotateX(120deg);}
            75%  {transform:rotateX(180deg);}
            100% {transform:rotateX(360deg);}
         }
      </style>
      <div id = "databinding">
         <button v-on:click = "show = !show">點選我</button>
         <transition name = "shiftx">
            <p v-show = "show">
               <img src = "images/mydog.jpg" style = "width:100px;height:100px;" />
            </p>
         </transition>
      </div>
      <script type = "text/javascript">
         var vm = new Vue({
            el: '#databinding',
            data: {
               show:true
            },
            methods : {
            }
         });
      </script>
   </body>
</html>
要應用動畫,類與轉換相同。 在上面的程式碼中,有一個以p標籤封裝的影象,如下面的一段程式碼所示 -
<transition name = "shiftx">
   <p v-show = "show"><img src = "images/img.jpg" style = "width:100px;height:100px;" /></p>
</transition>
過渡的名字是shiftx。 所宣告的類如下 -
<style>
   .shiftx-enter-active {
      animation: shift-in 2s;
   }
   .shiftx-leave-active {
      animation: shift-in 2s reverse;
   }
   @keyframes shift-in {
      0%   {transform:rotateX(0deg);}
      25%  {transform:rotateX(90deg);}
      50%  {transform:rotateX(120deg);}
      75%  {transform:rotateX(180deg);}
      100% {transform:rotateX(360deg);}
   }
</style>
該類以轉換名稱作為字首,即shiftx-enter-active和.shiftx-leave-active。 動畫是使用從0%到100%的關鍵影格定義的。 在每個關鍵影格處定義的變換如下面的一段程式碼所示。
@keyframes shift-in {
   0%   {transform:rotateX(0deg);}
   25%  {transform:rotateX(90deg);}
   50%  {transform:rotateX(120deg);}
   75%  {transform:rotateX(180deg);}
   100% {transform:rotateX(360deg);}
}
在瀏覽器中顯示效果如下 -
自定義轉換類
VueJS提供了自定義類的列表,可以將其作為屬性新增到過渡元素。
- enter-class
- enter-active-class
- leave-class
- leave-active-class
自定義類基本上是想要使用外部CSS庫(如:animate.css)時發揮作用。
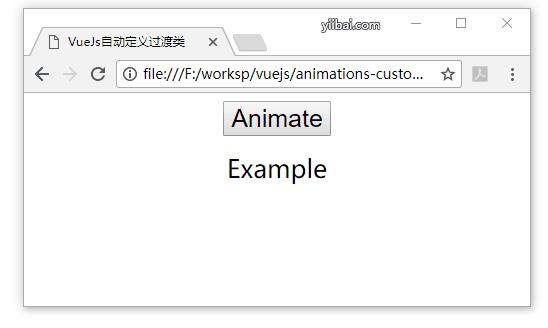
建立一個檔案:animations-custom.html -
<html>
   <head>
   <meta charset="utf-8" />
      <title>VueJs自動定義過渡類</title>
      <link href = "http://cdn.jsdelivr.net/npm/[email protected]" rel = "stylesheet" type = "text/css">
      <script type = "text/javascript" src = "js/vue.js"></script>
   </head>
   <body>
      <div id = "animate" style = "text-align:center">
         <button @click = "show = !show"><span style = "font-size:25px;">Animate</span></button>
         <transition
            name = "custom-classes-transition"
            enter-active-class = "animated swing"
            leave-active-class = "animated bounceIn">
            <p v-if = "show"><span style = "font-size:25px;">Example</span></p>
         </transition>
      </div>
      <script type = "text/javascript">
         var vm =  new Vue({
            el: '#animate',
            data: {
               show: true
            }
         });
      </script>
   </body>
</html>
在瀏覽器中輸出結果如下 -
顯式轉換時間
可以使用VueJS在元素上應用過渡和動畫。Vue等待transionend和animationend事件來檢測動畫或轉換是否完成。
有時候過渡可能會導致延遲。在這種情況下,可以明確地應用這個持續時間如下 -
<transition :duration = "1000"></transition>
<transition :duration = "{ enter: 500, leave: 800 }">...</transition>
如上所示,可以在轉換元素上使用duration屬性。如果需要分別指定進入和離開的持續時間,可以按照上面的程式碼所示完成。
JavaScript掛鉤
可以使用JavaScript事件將過渡類稱為方法。來看下以下一個更好理解的例子。建立一個檔案:javascript-hooks.html -
<html>
   <head>
      <meta charset="utf-8" />
      <title>VueJs Javascript掛鉤</title>
      <script type = "text/javascript" src = "js/vue.js"></script>
   </head>
   <body>
      <script src = "http://cdnjs.cloudflare.com/ajax/libs/velocity/1.2.3/velocity.min.js"></script>
      <div id = "example-4">
         <button @click = "show = !show">
            <span style = "font-size:25px;">Toggle</span>
         </button>
         <transition  v-on:before-enter = "beforeEnter"
            v-on:enter = "enter"
            v-on:leave = "leave"
            v-bind:css = "false">
            <p v-if = "show" style = "font-size:25px;">Animation Example with velocity</p>
         </transition>
      </div>
      <script type = "text/javascript">
         var vm = new Vue({
            el: '#example-4',
            data: {
               show: false
            },
            methods: {
               beforeEnter: function (el) {
                  el.style.opacity = 0
               },
               enter: function (el, done) {
                  Velocity(el, { opacity: 1, fontSize: '25px' }, { duration: 1000 })
                  Velocity(el, { fontSize: '10px' }, { complete: done })
               },
               leave: function (el, done) {
                  Velocity(el, { translateX: '15px', rotateZ: '50deg' }, { duration: 1500 })
                  Velocity(el, { rotateZ: '100deg' }, { loop: 2 })
                  Velocity(el, {
                     rotateZ: '45deg',
                     translateY: '30px',
                     translateX: '30px',
                     opacity: 0
                  }, { complete: done })
               }
            }
         });
      </script>
   </body>
</html>
在瀏覽器中,檢視上面程式碼執行結果如下 -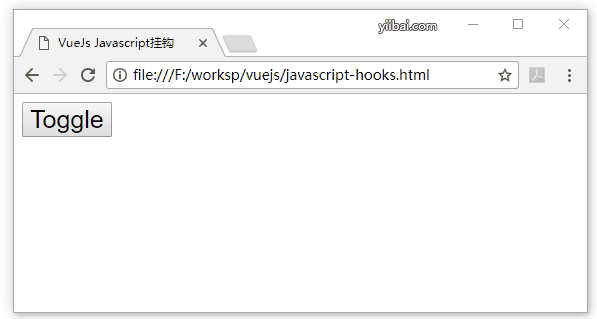
在上面的例子中,使用js方法在轉換元素上執行動畫。轉換的方法應用如下 -
<transition  v-on:before-enter = "beforeEnter"
   v-on:enter = "enter"
   v-on:leave = "leave"
   v-bind:css = "false">
   <p v-if = "show" style = "font-size:25px;">Animation Example with velocity</p>
</transition>
有一個字首新增v-on和該方法被呼叫的事件的名稱。這些方法在Vue範例中定義如下 -
methods: {
   beforeEnter: function (el) {
      el.style.opacity = 0
   },
   enter: function (el, done) {
      Velocity(el, { opacity: 1, fontSize: '25px' }, { duration: 1000 })
      Velocity(el, { fontSize: '10px' }, { complete: done })
   },
   leave: function (el, done) {
      Velocity(el, { translateX: '15px', rotateZ: '50deg' }, { duration: 1500 })
      Velocity(el, { rotateZ: '100deg' }, { loop: 2 })
      Velocity(el, {
         rotateZ: '45deg',
         translateY: '30px',
         translateX: '30px',
         opacity: 0
      }, { complete: done })
   }
}
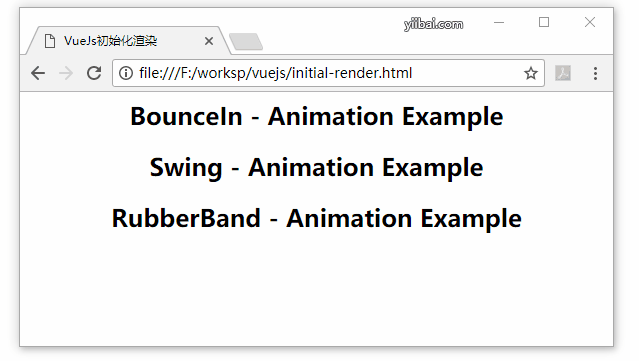
初始渲染過渡
在在開始時新增動畫,需要為過渡元素新增「出現」屬性。
我們來看一個例子以更好地理解它。建立一個檔案:initial-render.html -
<html>
   <head>
      <meta charset="utf-8" />
      <title>VueJs初始化渲染</title>
      <link href = "http://cdn.jsdelivr.net/npm/[email protected]" rel = "stylesheet" type = "text/css">
      <script type = "text/javascript" src = "js/vue.js"></script>
   </head>
   <body>
      <div id = "animate" style = "text-align:center">
         <transition
            appear
            appear-class = "custom-appear-class"
            appear-active-class = "animated bounceIn">
            <h2>BounceIn - Animation Example</h2>
         </transition>
         <transition
            appear
            appear-class = "custom-appear-class"
            appear-active-class = "animated swing">
            <h2>Swing - Animation Example</h2>
         </transition>
         <transition
            appear
            appear-class = "custom-appear-class"
            appear-active-class = "animated rubberBand">
            <h2>RubberBand - Animation Example</h2>
         </transition>
      </div>
      <script type = "text/javascript">
         var vm =  new Vue({
            el: '#animate',
            data: {
               show: true
            }
         });
      </script>
   </body>
</html>
在上面的例子中,使用了animate.css庫中的三個不同的動畫。並且已經新增到過渡元素。
在執行上面的程式碼時,瀏覽器中的輸出效果是 -