Spring Security+Hibernate記住我範例
"記住我" 是持久登入認證,應用程式會記住對談使用者的身份。基本上,在登入時當你使用"記住我"功能支援,應用程式會將一個cookie在登入成功後傳送到瀏覽器。這個 cookie 將被儲存在瀏覽器端,並繼續在一定期限(由cookie生命過期時間定義)。 下一次,當您嘗試存取該應用程式,瀏覽器將檢測到的cookie(如果仍然有效)那麼些使用者將會自動登入,無需提供如使用者ID/密碼。
-
簡單基於雜湊標記的方法:它使用雜湊來保護基於cookie標記的安全性
-
持久化標記方法:它使用一個資料庫或其他持久化儲存機制來儲存生成的標記
CREATE TABLE persistent_logins (
    username VARCHAR(64) NOT NULL,
    series VARCHAR(64) NOT NULL,
    token VARCHAR(64) NOT NULL,
    last_used TIMESTAMP NOT NULL,
    PRIMARY KEY (series)
);
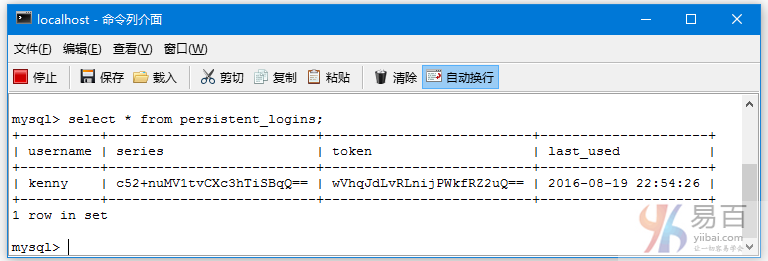
此表包含使用者名,「記住我」的最後一次活動時間(last_used時間戳),Bcrypt內部實現安全令牌和一系列資訊。
package com.yiibai.springsecurity.configuration;

import javax.sql.DataSource;

import org.springframework.beans.factory.annotation.Autowired;
import org.springframework.beans.factory.annotation.Qualifier;
import org.springframework.context.annotation.Bean;
import org.springframework.context.annotation.Configuration;
import org.springframework.security.config.annotation.authentication.builders.AuthenticationManagerBuilder;
import org.springframework.security.config.annotation.web.builders.HttpSecurity;
import org.springframework.security.config.annotation.web.configuration.EnableWebSecurity;
import org.springframework.security.config.annotation.web.configuration.WebSecurityConfigurerAdapter;
import org.springframework.security.core.userdetails.UserDetailsService;
import org.springframework.security.web.authentication.rememberme.JdbcTokenRepositoryImpl;
import org.springframework.security.web.authentication.rememberme.PersistentTokenRepository;

@Configuration
@EnableWebSecurity
public class SecurityConfiguration extends WebSecurityConfigurerAdapter {

	@Autowired
	@Qualifier("customUserDetailsService")
	UserDetailsService userDetailsService;

	@Autowired
	DataSource dataSource;

	@Autowired
	public void configureGlobalSecurity(AuthenticationManagerBuilder auth) throws Exception {
		auth.userDetailsService(userDetailsService);
	}

	@Override
	protected void configure(HttpSecurity http) throws Exception {
	  http.authorizeRequests()
	  	.antMatchers("/", "/home").permitAll()
	  	.antMatchers("/admin/**").access("hasRole('ADMIN')")
	  	.antMatchers("/db/**").access("hasRole('ADMIN') and hasRole('DBA')")
	  	.and().formLogin().loginPage("/login")
	  	.usernameParameter("ssoId").passwordParameter("password")
	  	.and().rememberMe().rememberMeParameter("remember-me").tokenRepository(persistentTokenRepository()).tokenValiditySeconds(86400)
	  	.and().csrf()
	  	.and().exceptionHandling().accessDeniedPage("/Access_Denied");
	}

	@Bean
	public PersistentTokenRepository persistentTokenRepository() {
		JdbcTokenRepositoryImpl tokenRepositoryImpl = new JdbcTokenRepositoryImpl();
		tokenRepositoryImpl.setDataSource(dataSource);
		return tokenRepositoryImpl;
	}
}
請注意,我們可呼叫 rememberMe() 來組態記住我,在檢視中提供一個「記住我」核取方塊身份驗證的HTTP引數名稱(我們將在檢視中看到)。我們還指定要使用 tokenRepository(令牌將被儲存),並將該令牌的時間(以秒為單位)仍然有效。要組態儲存庫時我們要注入了一個資料源。
<beans:beans xmlns="http://www.springframework.org/schema/security"
    xmlns:beans="http://www.springframework.org/schema/beans"
    xmlns:xsi="http://www.w3.org/2001/XMLSchema-instance"
    xsi:schemaLocation="http://www.springframework.org/schema/beans http://www.springframework.org/schema/beans/spring-beans-4.1.xsd
    http://www.springframework.org/schema/security http://www.springframework.org/schema/security/spring-security-4.0.xsd">

    <http auto-config="true" >
        <intercept-url pattern="/" access="permitAll" />
        <intercept-url pattern="/home" access="permitAll" />
        <intercept-url pattern="/admin**" access="hasRole('ADMIN')" />
        <intercept-url pattern="/dba**" access="hasRole('ADMIN') and hasRole('DBA')" />
        <form-login  login-page="/login"
                     username-parameter="ssoId"
                     password-parameter="password"
                     authentication-failure-url="/Access_Denied" />
        <csrf/>
    </http>

    <authentication-manager >
        <authentication-provider user-service-ref="customUserDetailsService"/>
    </authentication-manager>

    <remember-me
        remember-me-parameter="remember-me"
        remember-me-cookie="remember-me"
        token-validity-seconds="86400"
	data-source-ref="dataSource" />

    <beans:bean id="customUserDetailsService" class="com.yiibai.springsecurity.service.CustomUserDetailsService" />

</beans:beans>
完整的範例
- Spring 4.1.6.RELEASE
- Spring Security 4.0.1.RELEASE
- Hibernate 4.3.6.Final
- MySQL Server 5.6
- Maven 3
- JDK 1.7
- Tomcat 8.0.21
- Eclipse JUNO Service Release 2
現在就讓我們開始吧!
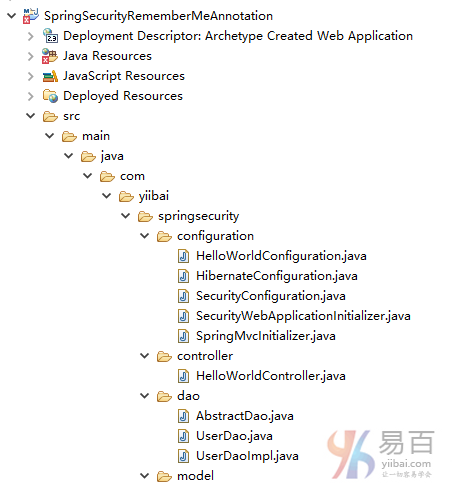
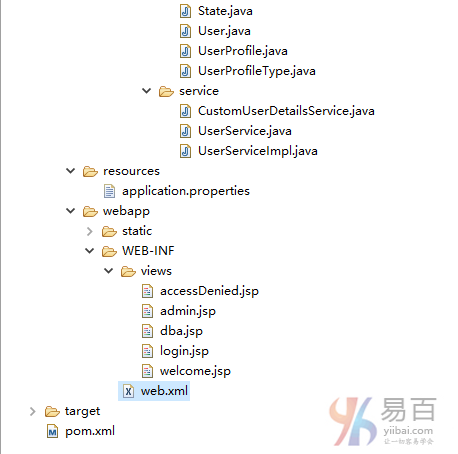
第1步: 工程目錄結構
第2步:更新 pom.xml 以包括所需的相關性
<project xmlns="http://maven.apache.org/POM/4.0.0" xmlns:xsi="http://www.w3.org/2001/XMLSchema-instance"
  xsi:schemaLocation="http://maven.apache.org/POM/4.0.0 http://maven.apache.org/xsd/maven-4.0.0.xsd">
  <modelVersion>4.0.0</modelVersion>

  <groupId>com.yiibai.springsecurity</groupId>
  <artifactId>SpringSecurityRememberMeAnnotationExample</artifactId>
  <version>1.0.0</version>
  <packaging>war</packaging>

  <name>SpringSecurityRememberMeAnnotationExample</name>

 	<properties>
		<springframework.version>4.1.6.RELEASE</springframework.version>
		<springsecurity.version>4.0.1.RELEASE</springsecurity.version>
		<hibernate.version>4.3.6.Final</hibernate.version>
		<mysql.version>5.1.31</mysql.version>
	</properties>

	<dependencies>

		<!-- Spring -->
		<dependency>
			<groupId>org.springframework</groupId>
			<artifactId>spring-core</artifactId>
			<version>${springframework.version}</version>
		</dependency>
		<dependency>
			<groupId>org.springframework</groupId>
			<artifactId>spring-web</artifactId>
			<version>${springframework.version}</version>
		</dependency>
		<dependency>
			<groupId>org.springframework</groupId>
			<artifactId>spring-webmvc</artifactId>
			<version>${springframework.version}</version>
		</dependency>
		<dependency>
			<groupId>org.springframework</groupId>
			<artifactId>spring-tx</artifactId>
			<version>${springframework.version}</version>
		</dependency>
		<dependency>
			<groupId>org.springframework</groupId>
			<artifactId>spring-orm</artifactId>
			<version>${springframework.version}</version>
		</dependency>


		<!-- Spring Security -->
		<dependency>
			<groupId>org.springframework.security</groupId>
			<artifactId>spring-security-web</artifactId>
			<version>${springsecurity.version}</version>
		</dependency>
		<dependency>
			<groupId>org.springframework.security</groupId>
			<artifactId>spring-security-config</artifactId>
			<version>${springsecurity.version}</version>
		</dependency>
		<dependency>
			<groupId>org.springframework.security</groupId>
			<artifactId>spring-security-taglibs</artifactId>
			<version>${springsecurity.version}</version>
		</dependency>

		<!-- Hibernate -->
		<dependency>
			<groupId>org.hibernate</groupId>
			<artifactId>hibernate-core</artifactId>
			<version>${hibernate.version}</version>
		</dependency>

		<!-- MySQL -->
		<dependency>
			<groupId>mysql</groupId>
			<artifactId>mysql-connector-java</artifactId>
			<version>${mysql.version}</version>
		</dependency>

		<dependency>
			<groupId>javax.servlet</groupId>
			<artifactId>javax.servlet-api</artifactId>
			<version>3.1.0</version>
		</dependency>
		<dependency>
			<groupId>javax.servlet.jsp</groupId>
			<artifactId>javax.servlet.jsp-api</artifactId>
			<version>2.3.1</version>
		</dependency>
		<dependency>
			<groupId>javax.servlet</groupId>
			<artifactId>jstl</artifactId>
			<version>1.2</version>
		</dependency>
	</dependencies>

	<build>
		<pluginManagement>
			<plugins>
				<plugin>
					<groupId>org.apache.maven.plugins</groupId>
					<artifactId>maven-compiler-plugin</artifactId>
					<version>3.2</version>
					<configuration>
						<source>1.7</source>
						<target>1.7</target>
					</configuration>
				</plugin>
				<plugin>
					<groupId>org.apache.maven.plugins</groupId>
					<artifactId>maven-war-plugin</artifactId>
					<version>2.4</version>
					<configuration>
						<warSourceDirectory>src/main/webapp</warSourceDirectory>
						<warName>SpringSecurityRememberMeAnnotationExample</warName>
						<failOnMissingWebXml>false</failOnMissingWebXml>
					</configuration>
				</plugin>
			</plugins>
		</pluginManagement>
		<finalName>SpringSecurityRememberMeAnnotationExample</finalName>
	</build>
</project>
資料庫表部分
第3步:建立資料庫模式並填充資料
/* For Remember-Me token storage purpose */
CREATE TABLE persistent_logins (
    username VARCHAR(64) NOT NULL,
    series VARCHAR(64) NOT NULL,
    token VARCHAR(64) NOT NULL,
    last_used TIMESTAMP NOT NULL,
    PRIMARY KEY (series)
);


/*All User's gets stored in APP_USER table*/
create table APP_USER (
   id BIGINT NOT NULL AUTO_INCREMENT,
   sso_id VARCHAR(30) NOT NULL,
   password VARCHAR(100) NOT NULL,
   first_name VARCHAR(30) NOT NULL,
   last_name  VARCHAR(30) NOT NULL,
   email VARCHAR(30) NOT NULL,
   state VARCHAR(30) NOT NULL,
   PRIMARY KEY (id),
   UNIQUE (sso_id)
);

/* USER_PROFILE table contains all possible roles */
create table USER_PROFILE(
   id BIGINT NOT NULL AUTO_INCREMENT,
   type VARCHAR(30) NOT NULL,
   PRIMARY KEY (id),
   UNIQUE (type)
);

/* JOIN TABLE for MANY-TO-MANY relationship*/
CREATE TABLE APP_USER_USER_PROFILE (
    user_id BIGINT NOT NULL,
    user_profile_id BIGINT NOT NULL,
    PRIMARY KEY (user_id, user_profile_id),
    CONSTRAINT FK_APP_USER FOREIGN KEY (user_id) REFERENCES APP_USER (id),
    CONSTRAINT FK_USER_PROFILE FOREIGN KEY (user_profile_id) REFERENCES USER_PROFILE (id)
);

/* Populate USER_PROFILE Table */
INSERT INTO USER_PROFILE(type)
VALUES ('USER');

INSERT INTO USER_PROFILE(type)
VALUES ('ADMIN');

INSERT INTO USER_PROFILE(type)
VALUES ('DBA');

/* Populate one Admin User. We need only one user to demonstrate this example. You can add more as done in previous posts*/
INSERT INTO APP_USER(sso_id, password, first_name, last_name, email, state)
VALUES ('sam','abc125', 'Sam','Smith','[email protected]', 'Active');

/* Populate JOIN Table */
INSERT INTO APP_USER_USER_PROFILE (user_id, user_profile_id)
  SELECT user.id, profile.id FROM app_user user, user_profile profile
  where user.sso_id='sam' and profile.type='ADMIN';
安全部分
第4步:新增 Spring Security 組態類
package com.yiibai.springsecurity.configuration;

import javax.sql.DataSource;

import org.springframework.beans.factory.annotation.Autowired;
import org.springframework.beans.factory.annotation.Qualifier;
import org.springframework.context.annotation.Bean;
import org.springframework.context.annotation.Configuration;
import org.springframework.security.config.annotation.authentication.builders.AuthenticationManagerBuilder;
import org.springframework.security.config.annotation.web.builders.HttpSecurity;
import org.springframework.security.config.annotation.web.configuration.EnableWebSecurity;
import org.springframework.security.config.annotation.web.configuration.WebSecurityConfigurerAdapter;
import org.springframework.security.core.userdetails.UserDetailsService;
import org.springframework.security.web.authentication.rememberme.JdbcTokenRepositoryImpl;
import org.springframework.security.web.authentication.rememberme.PersistentTokenRepository;

@Configuration
@EnableWebSecurity
public class SecurityConfiguration extends WebSecurityConfigurerAdapter {

	@Autowired
	@Qualifier("customUserDetailsService")
	UserDetailsService userDetailsService;

	@Autowired
	DataSource dataSource;

	@Autowired
	public void configureGlobalSecurity(AuthenticationManagerBuilder auth) throws Exception {
		auth.userDetailsService(userDetailsService);
	}

	@Override
	protected void configure(HttpSecurity http) throws Exception {
	  http.authorizeRequests()
	  	.antMatchers("/", "/home").permitAll()
	  	.antMatchers("/admin/**").access("hasRole('ADMIN')")
	  	.antMatchers("/db/**").access("hasRole('ADMIN') and hasRole('DBA')")
	  	.and().formLogin().loginPage("/login")
	  	.usernameParameter("ssoId").passwordParameter("password")
	  	.and().rememberMe().rememberMeParameter("remember-me").tokenRepository(persistentTokenRepository()).tokenValiditySeconds(86400)
	  	.and().csrf()
	  	.and().exceptionHandling().accessDeniedPage("/Access_Denied");

	}

	@Bean
	public PersistentTokenRepository persistentTokenRepository() {
		JdbcTokenRepositoryImpl tokenRepositoryImpl = new JdbcTokenRepositoryImpl();
		tokenRepositoryImpl.setDataSource(dataSource);
		return tokenRepositoryImpl;
	}
}
第5步:使用war註冊springSecurityFilter
package com.yiibai.springsecurity.configuration;

import org.springframework.security.web.context.AbstractSecurityWebApplicationInitializer;

public class SecurityWebApplicationInitializer extends AbstractSecurityWebApplicationInitializer {

}
以上組態以XML組態格式為:
<filter>
    <filter-name>springSecurityFilterChain</filter-name>
    <filter-class>org.springframework.web.filter.DelegatingFilterProxy</filter-class>
</filter>

<filter-mapping>
    <filter-name>springSecurityFilterChain</filter-name>
    <url-pattern>/*</url-pattern>
</filter-mapping>
第6步:定義UserDetailsService實現
package com.yiibai.springsecurity.service;

import java.util.ArrayList;
import java.util.List;

import org.springframework.beans.factory.annotation.Autowired;
import org.springframework.security.core.GrantedAuthority;
import org.springframework.security.core.authority.SimpleGrantedAuthority;
import org.springframework.security.core.userdetails.UserDetails;
import org.springframework.security.core.userdetails.UserDetailsService;
import org.springframework.security.core.userdetails.UsernameNotFoundException;
import org.springframework.stereotype.Service;
import org.springframework.transaction.annotation.Transactional;

import com.yiibai.springsecurity.model.User;
import com.yiibai.springsecurity.model.UserProfile;

@Service("customUserDetailsService")
public class CustomUserDetailsService implements UserDetailsService{

	@Autowired
	private UserService userService;

	@Transactional(readOnly=true)
	public UserDetails loadUserByUsername(String ssoId)
			throws UsernameNotFoundException {
		User user = userService.findBySso(ssoId);
		System.out.println("User : "+user);
		if(user==null){
			System.out.println("User not found");
			throw new UsernameNotFoundException("Username not found");
		}
			return new org.springframework.security.core.userdetails.User(user.getSsoId(), user.getPassword(),
				 user.getState().equals("Active"), true, true, true, getGrantedAuthorities(user));
	}


	private List<GrantedAuthority> getGrantedAuthorities(User user){
		List<GrantedAuthority> authorities = new ArrayList<GrantedAuthority>();

		for(UserProfile userProfile : user.getUserProfiles()){
			System.out.println("UserProfile : "+userProfile);
			authorities.add(new SimpleGrantedAuthority("ROLE_"+userProfile.getType()));
		}
		System.out.print("authorities :"+authorities);
		return authorities;
	}

}
SpringMVC部分
第7步: 新增控制器
package com.yiibai.springsecurity.controller;

import javax.servlet.http.HttpServletRequest;
import javax.servlet.http.HttpServletResponse;

import org.springframework.security.core.Authentication;
import org.springframework.security.core.context.SecurityContextHolder;
import org.springframework.security.core.userdetails.UserDetails;
import org.springframework.security.web.authentication.logout.SecurityContextLogoutHandler;
import org.springframework.stereotype.Controller;
import org.springframework.ui.ModelMap;
import org.springframework.web.bind.annotation.RequestMapping;
import org.springframework.web.bind.annotation.RequestMethod;

@Controller
public class HelloWorldController {


	@RequestMapping(value = { "/", "/home" }, method = RequestMethod.GET)
	public String homePage(ModelMap model) {
		model.addAttribute("greeting", "Hi, Welcome to mysite");
		return "welcome";
	}

	@RequestMapping(value = "/admin", method = RequestMethod.GET)
	public String adminPage(ModelMap model) {
		model.addAttribute("user", getPrincipal());
		return "admin";
	}

	@RequestMapping(value = "/db", method = RequestMethod.GET)
	public String dbaPage(ModelMap model) {
		model.addAttribute("user", getPrincipal());
		return "dba";
	}

	@RequestMapping(value = "/Access_Denied", method = RequestMethod.GET)
	public String accessDeniedPage(ModelMap model) {
		model.addAttribute("user", getPrincipal());
		return "accessDenied";
	}

	@RequestMapping(value = "/login", method = RequestMethod.GET)
	public String loginPage() {
		return "login";
	}

	@RequestMapping(value="/logout", method = RequestMethod.GET)
	public String logoutPage (HttpServletRequest request, HttpServletResponse response) {
		Authentication auth = SecurityContextHolder.getContext().getAuthentication();
		if (auth != null){
			new SecurityContextLogoutHandler().logout(request, response, auth);
		}
		return "redirect:/login?logout";
	}

	private String getPrincipal(){
		String userName = null;
		Object principal = SecurityContextHolder.getContext().getAuthentication().getPrincipal();

		if (principal instanceof UserDetails) {
			userName = ((UserDetails)principal).getUsername();
		} else {
			userName = principal.toString();
		}
		return userName;
	}


}
第8步: 新增 SpringMVC 組態類
package com.yiibai.springsecurity.configuration;

import org.springframework.context.annotation.Bean;
import org.springframework.context.annotation.ComponentScan;
import org.springframework.context.annotation.Configuration;
import org.springframework.web.servlet.ViewResolver;
import org.springframework.web.servlet.config.annotation.EnableWebMvc;
import org.springframework.web.servlet.config.annotation.ResourceHandlerRegistry;
import org.springframework.web.servlet.config.annotation.WebMvcConfigurerAdapter;
import org.springframework.web.servlet.view.InternalResourceViewResolver;
import org.springframework.web.servlet.view.JstlView;

@Configuration
@EnableWebMvc
@ComponentScan(basePackages = "com.yiibai.springsecurity")
public class HelloWorldConfiguration extends WebMvcConfigurerAdapter {

	@Bean(name="HelloWorld")
	public ViewResolver viewResolver() {
		InternalResourceViewResolver viewResolver = new InternalResourceViewResolver();
		viewResolver.setViewClass(JstlView.class);
		viewResolver.setPrefix("/WEB-INF/views/");
		viewResolver.setSuffix(".jsp");

		return viewResolver;
	}

    /*
     * Configure ResourceHandlers to serve static resources like CSS/ Javascript etc...
     *
     */
    @Override
    public void addResourceHandlers(ResourceHandlerRegistry registry) {
        registry.addResourceHandler("/static/**").addResourceLocations("/static/");
    }
}
第9步: 新增初始化類
package com.yiibai.springsecurity.configuration;

import org.springframework.web.servlet.support.AbstractAnnotationConfigDispatcherServletInitializer;

public class SpringMvcInitializer extends AbstractAnnotationConfigDispatcherServletInitializer {

	@Override
	protected Class<?>[] getRootConfigClasses() {
		return new Class[] { HelloWorldConfiguration.class };
	}

	@Override
	protected Class<?>[] getServletConfigClasses() {
		return null;
	}

	@Override
	protected String[] getServletMappings() {
		return new String[] { "/" };
	}

}
Hibernate組態部分
第10步: 建立Hibernate組態
package com.yiibai.springsecurity.configuration;

import java.util.Properties;

import javax.sql.DataSource;

import org.hibernate.SessionFactory;
import org.springframework.beans.factory.annotation.Autowired;
import org.springframework.context.annotation.Bean;
import org.springframework.context.annotation.ComponentScan;
import org.springframework.context.annotation.Configuration;
import org.springframework.context.annotation.PropertySource;
import org.springframework.core.env.Environment;
import org.springframework.jdbc.datasource.DriverManagerDataSource;
import org.springframework.orm.hibernate4.HibernateTransactionManager;
import org.springframework.orm.hibernate4.LocalSessionFactoryBean;
import org.springframework.transaction.annotation.EnableTransactionManagement;

@Configuration
@EnableTransactionManagement
@ComponentScan({ "com.yiibai.springsecurity.configuration" })
@PropertySource(value = { "classpath:application.properties" })
public class HibernateConfiguration {

    @Autowired
    private Environment environment;

    @Bean
    public LocalSessionFactoryBean sessionFactory() {
        LocalSessionFactoryBean sessionFactory = new LocalSessionFactoryBean();
        sessionFactory.setDataSource(dataSource());
        sessionFactory.setPackagesToScan(new String[] { "com.yiibai.springsecurity.model" });
        sessionFactory.setHibernateProperties(hibernateProperties());
        return sessionFactory;
     }

    @Bean
    public DataSource dataSource() {
        DriverManagerDataSource dataSource = new DriverManagerDataSource();
        dataSource.setDriverClassName(environment.getRequiredProperty("jdbc.driverClassName"));
        dataSource.setUrl(environment.getRequiredProperty("jdbc.url"));
        dataSource.setUsername(environment.getRequiredProperty("jdbc.username"));
        dataSource.setPassword(environment.getRequiredProperty("jdbc.password"));
        return dataSource;
    }

    private Properties hibernateProperties() {
        Properties properties = new Properties();
        properties.put("hibernate.dialect", environment.getRequiredProperty("hibernate.dialect"));
        properties.put("hibernate.show_sql", environment.getRequiredProperty("hibernate.show_sql"));
        properties.put("hibernate.format_sql", environment.getRequiredProperty("hibernate.format_sql"));
        return properties;
    }

    @Bean
    @Autowired
    public HibernateTransactionManager transactionManager(SessionFactory s) {
       HibernateTransactionManager txManager = new HibernateTransactionManager();
       txManager.setSessionFactory(s);
       return txManager;
    }
}
application.properties
jdbc.driverClassName = com.mysql.jdbc.Driver
jdbc.url = jdbc:mysql://localhost:3306/yiibai
jdbc.username = myuser
jdbc.password = mypassword
hibernate.dialect = org.hibernate.dialect.MySQLDialect
hibernate.show_sql = true
hibernate.format_sql = true
DAO, Model & Service服務
第11步: 建立模型類
package com.yiibai.springsecurity.model;

import java.util.HashSet;
import java.util.Set;

import javax.persistence.Column;
import javax.persistence.Entity;
import javax.persistence.FetchType;
import javax.persistence.GeneratedValue;
import javax.persistence.GenerationType;
import javax.persistence.Id;
import javax.persistence.JoinColumn;
import javax.persistence.JoinTable;
import javax.persistence.ManyToMany;
import javax.persistence.Table;

@Entity
@Table(name="APP_USER")
public class User {

	@Id @GeneratedValue(strategy=GenerationType.IDENTITY)
	private int id;

	@Column(name="SSO_ID", unique=true, nullable=false)
	private String ssoId;

	@Column(name="PASSWORD", nullable=false)
	private String password;

	@Column(name="FIRST_NAME", nullable=false)
	private String firstName;

	@Column(name="LAST_NAME", nullable=false)
	private String lastName;

	@Column(name="EMAIL", nullable=false)
	private String email;

	@Column(name="STATE", nullable=false)
	private String state=State.ACTIVE.getState();

	@ManyToMany(fetch = FetchType.EAGER)
	@JoinTable(name = "APP_USER_USER_PROFILE",
             joinColumns = { @JoinColumn(name = "USER_ID") },
             inverseJoinColumns = { @JoinColumn(name = "USER_PROFILE_ID") })
	private Set<UserProfile> userProfiles = new HashSet<UserProfile>();

	public int getId() {
		return id;
	}

	public void setId(int id) {
		this.id = id;
	}

	public String getSsoId() {
		return ssoId;
	}

	public void setSsoId(String ssoId) {
		this.ssoId = ssoId;
	}

	public String getPassword() {
		return password;
	}

	public void setPassword(String password) {
		this.password = password;
	}

	public String getFirstName() {
		return firstName;
	}

	public void setFirstName(String firstName) {
		this.firstName = firstName;
	}

	public String getLastName() {
		return lastName;
	}

	public void setLastName(String lastName) {
		this.lastName = lastName;
	}

	public String getEmail() {
		return email;
	}

	public void setEmail(String email) {
		this.email = email;
	}

	public String getState() {
		return state;
	}

	public void setState(String state) {
		this.state = state;
	}

	public Set<UserProfile> getUserProfiles() {
		return userProfiles;
	}

	public void setUserProfiles(Set<UserProfile> userProfiles) {
		this.userProfiles = userProfiles;
	}

	@Override
	public int hashCode() {
		final int prime = 31;
		int result = 1;
		result = prime * result + id;
		result = prime * result + ((ssoId == null) ? 0 : ssoId.hashCode());
		return result;
	}

	@Override
	public boolean equals(Object obj) {
		if (this == obj)
			return true;
		if (obj == null)
			return false;
		if (!(obj instanceof User))
			return false;
		User other = (User) obj;
		if (id != other.id)
			return false;
		if (ssoId == null) {
			if (other.ssoId != null)
				return false;
		} else if (!ssoId.equals(other.ssoId))
			return false;
		return true;
	}

	@Override
	public String toString() {
		return "User [id=" + id + ", ssoId=" + ssoId + ", password=" + password
				+ ", firstName=" + firstName + ", lastName=" + lastName
				+ ", email=" + email + ", state=" + state + ", userProfiles=" + userProfiles +"]";
	}


}
package com.yiibai.springsecurity.model;

import javax.persistence.Column;
import javax.persistence.Entity;
import javax.persistence.GeneratedValue;
import javax.persistence.GenerationType;
import javax.persistence.Id;
import javax.persistence.Table;

@Entity
@Table(name="USER_PROFILE")
public class UserProfile {

	@Id @GeneratedValue(strategy=GenerationType.IDENTITY)
	private int id;

	@Column(name="TYPE", length=15, unique=true, nullable=false)
	private String type = UserProfileType.USER.getUserProfileType();

	public int getId() {
		return id;
	}

	public void setId(int id) {
		this.id = id;
	}

	public String getType() {
		return type;
	}

	public void setType(String type) {
		this.type = type;
	}


	@Override
	public int hashCode() {
		final int prime = 31;
		int result = 1;
		result = prime * result + id;
		result = prime * result + ((type == null) ? 0 : type.hashCode());
		return result;
	}

	@Override
	public boolean equals(Object obj) {
		if (this == obj)
			return true;
		if (obj == null)
			return false;
		if (!(obj instanceof UserProfile))
			return false;
		UserProfile other = (UserProfile) obj;
		if (id != other.id)
			return false;
		if (type == null) {
			if (other.type != null)
				return false;
		} else if (!type.equals(other.type))
			return false;
		return true;
	}

	@Override
	public String toString() {
		return "UserProfile [id=" + id + ",  type=" + type	+ "]";
	}


}
package com.yiibai.springsecurity.model;

public enum UserProfileType {
	USER("USER"),
	DBA("DBA"),
	ADMIN("ADMIN");

	String userProfileType;

	private UserProfileType(String userProfileType){
		this.userProfileType = userProfileType;
	}

	public String getUserProfileType(){
		return userProfileType;
	}

}
package com.yiibai.springsecurity.model;

public enum State {

	ACTIVE("Active"),
	INACTIVE("Inactive"),
	DELETED("Deleted"),
	LOCKED("Locked");

	private String state;

	private State(final String state){
		this.state = state;
	}

	public String getState(){
		return this.state;
	}

	@Override
	public String toString(){
		return this.state;
	}


	public String getName(){
		return this.name();
	}


}
第12步: 建立 Dao 層
package com.yiibai.springsecurity.dao;

import java.io.Serializable;

import java.lang.reflect.ParameterizedType;

import org.hibernate.Criteria;
import org.hibernate.Session;
import org.hibernate.SessionFactory;
import org.springframework.beans.factory.annotation.Autowired;

public abstract class AbstractDao<PK extends Serializable, T> {

	private final Class<T> persistentClass;

	@SuppressWarnings("unchecked")
	public AbstractDao(){
		this.persistentClass =(Class<T>) ((ParameterizedType) this.getClass().getGenericSuperclass()).getActualTypeArguments()[1];
	}

	@Autowired
	private SessionFactory sessionFactory;

	protected Session getSession(){
		return sessionFactory.getCurrentSession();
	}

	@SuppressWarnings("unchecked")
	public T getByKey(PK key) {
		return (T) getSession().get(persistentClass, key);
	}

	public void persist(T entity) {
		getSession().persist(entity);
	}

	public void delete(T entity) {
		getSession().delete(entity);
	}

	protected Criteria createEntityCriteria(){
		return getSession().createCriteria(persistentClass);
	}

}
package com.yiibai.springsecurity.dao;

import com.yiibai.springsecurity.model.User;

public interface UserDao {

	User findById(int id);

	User findBySSO(String sso);

}
package com.yiibai.springsecurity.dao;

import org.hibernate.Criteria;
import org.hibernate.criterion.Restrictions;
import org.springframework.stereotype.Repository;

import com.yiibai.springsecurity.model.User;

@Repository("userDao")
public class UserDaoImpl extends AbstractDao<Integer, User> implements UserDao {

	public User findById(int id) {
		return getByKey(id);
	}

	public User findBySSO(String sso) {
		Criteria crit = createEntityCriteria();
		crit.add(Restrictions.eq("ssoId", sso));
		return (User) crit.uniqueResult();
	}


}
第13步: 建立Service層
package com.yiibai.springsecurity.service;

import com.yiibai.springsecurity.model.User;

public interface UserService {

	User findById(int id);

	User findBySso(String sso);

}
package com.yiibai.springsecurity.service;

import org.springframework.beans.factory.annotation.Autowired;
import org.springframework.stereotype.Service;
import org.springframework.transaction.annotation.Transactional;

import com.yiibai.springsecurity.dao.UserDao;
import com.yiibai.springsecurity.model.User;

@Service("userService")
@Transactional
public class UserServiceImpl implements UserService{

	@Autowired
	private UserDao dao;

	public User findById(int id) {
		return dao.findById(id);
	}

	public User findBySso(String sso) {
		return dao.findBySSO(sso);
	}

}
檢視部分
第14步:新增檢視
login.jsp
<%@ page language="java" contentType="text/html; charset=ISO-8859-1" pageEncoding="ISO-8859-1"%>
<%@ taglib prefix="c" uri="http://java.sun.com/jsp/jstl/core"%>
<html>
<head>
<meta http-equiv="Content-Type" content="text/html; charset=ISO-8859-1">
<title>HelloWorld Login page</title>
<link href="<c:url value='/static/css/bootstrap.css' />" rel="stylesheet"></link>
<link href="<c:url value='/static/css/app.css' />" rel="stylesheet"></link>
<link rel="stylesheet" type="text/css" href="//cdnjs.cloudflare.com/ajax/libs/font-awesome/4.2.0/css/font-awesome.css" />
</head>
<body>
<div id="mainWrapper">
<div class="login-container">
<div class="login-card">
<div class="login-form">
<c:url var="loginUrl" value="/login" />
<form action="${loginUrl}" method="post" class="form-horizontal">
<c:if test="${param.error != null}">
<div class="alert alert-danger">
<p>Invalid username and password.</p>
</div>
</c:if>
<c:if test="${param.logout != null}">
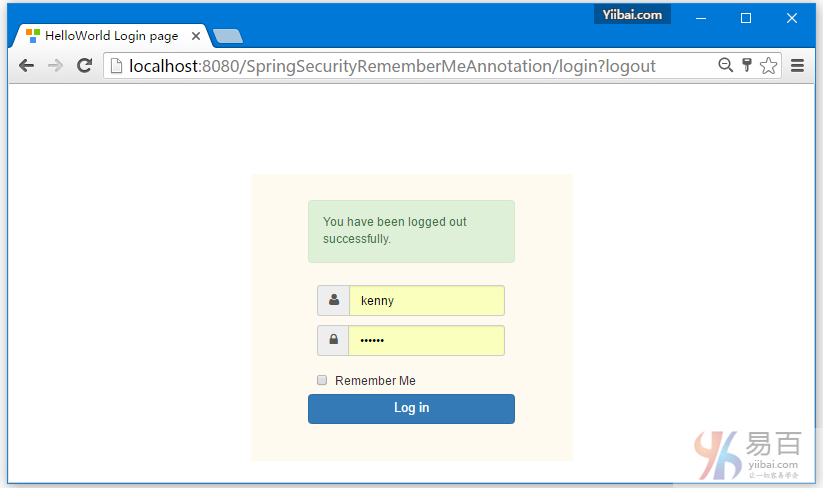
<div class="alert alert-success">
<p>You have been logged out successfully.</p>
</div>
</c:if>
<div class="input-group input-sm">
<label class="input-group-addon" for="username"><i class="fa fa-user"></i></label>
<input type="text" class="form-control" id="username" name="ssoId" placeholder="Enter Username" required>
</div>
<div class="input-group input-sm">
<label class="input-group-addon" for="password"><i class="fa fa-lock"></i></label>
<input type="password" class="form-control" id="password" name="password" placeholder="Enter Password" required>
</div>
<div class="input-group input-sm">
<div class="checkbox">
<label><input type="checkbox" id="rememberme" name="remember-me"> Remember Me</label>
</div>
</div>
<input type="hidden" name="${_csrf.parameterName}"
value="${_csrf.token}" />
<div class="form-actions">
<input type="submit"
class="btn btn-block btn-primary btn-default" value="Log in">
</div>
</form>
</div>
</div>
</div>
</div>
</body>
</html>
正如你所看到的,CSRF引數需要在JSP中的EL表示式存取,所以還需要通過添將以下的程式碼新增JSP的頂部來強行執行EL表示式解析編譯:
<%@ page isELIgnored="false"%>
admin.jsp
<%@ page language="java" contentType="text/html; charset=ISO-8859-1" pageEncoding="ISO-8859-1"%>
<%@ taglib prefix="c" uri="http://java.sun.com/jsp/jstl/core"%>
<%@ taglib prefix="sec" uri="http://www.springframework.org/security/tags"%>
<html>
<head>
<meta http-equiv="Content-Type" content="text/html; charset=ISO-8859-1">
<title>Admin page</title>
</head>
<body>
Dear <strong>${user}</strong>, Welcome to Admin Page.
<sec:authorize access="isFullyAuthenticated()">
<label><a href="#">Create New User</a> | <a href="#">View existing Users</a></label>
</sec:authorize>
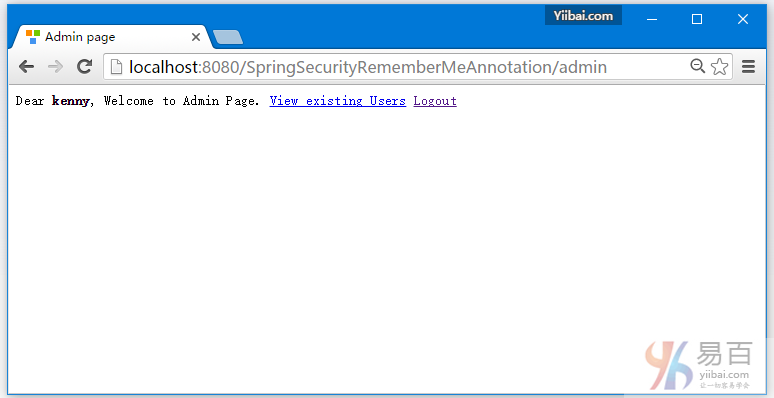
<sec:authorize access="isRememberMe()">
<label><a href="#">View existing Users</a></label>
</sec:authorize>
<a href="<c:url value="/logout" />">Logout</a>
</body>
</html>
welcome.jsp
<%@ page language="java" contentType="text/html; charset=ISO-8859-1" pageEncoding="ISO-8859-1"%>
<%@ taglib prefix="c" uri="http://java.sun.com/jsp/jstl/core"%>
<html>
<head>
	<meta http-equiv="Content-Type" content="text/html; charset=ISO-8859-1">
	<title>Welcome page</title>
	<link href="<c:url value='/static/css/bootstrap.css' />" rel="stylesheet"></link>
	<link href="<c:url value='/static/css/app.css' />" rel="stylesheet"></link>
</head>
<body>
	<div class="success">
		Greeting : ${greeting}
		This is a welcome page.
	</div>
</body>
</html>
dba.jsp
<%@ page language="java" contentType="text/html; charset=ISO-8859-1"  pageEncoding="ISO-8859-1"%>
<%@ taglib prefix="c" uri="http://java.sun.com/jsp/jstl/core"%>
<html>
<head>
<meta http-equiv="Content-Type" content="text/html; charset=ISO-8859-1">
<title>DBA page</title>
</head>
<body>
	Dear <strong>${user}</strong>, Welcome to DBA Page.
	<a href="<c:url value="/logout" />">Logout</a>
</body>
</html>
accessDenied.jsp
<%@ page language="java" contentType="text/html; charset=ISO-8859-1" pageEncoding="ISO-8859-1"%>
<%@ taglib prefix="c" uri="http://java.sun.com/jsp/jstl/core"%>
<html>
<head>
	<meta http-equiv="Content-Type" content="text/html; charset=ISO-8859-1">
	<title>AccessDenied page</title>
</head>
<body>
	Dear <strong>${user}</strong>, You are not authorized to access this page
	<a href="<c:url value="/logout" />">Logout</a>
</body>
</html>
第16步 - 構建和部署應用程式
現在構造 war(通過 eclipse/m2eclipse)或通過Maven的命令列(mvn clean install)。部署WAR檔案到Servlet3.0容器。由於這裡我使用的是在 eclipse 中組態 Tomcat,可以直接發佈到 Tomcat 服務容器中。如果不知道怎麼使用,可以參考:/20/223/8584.html
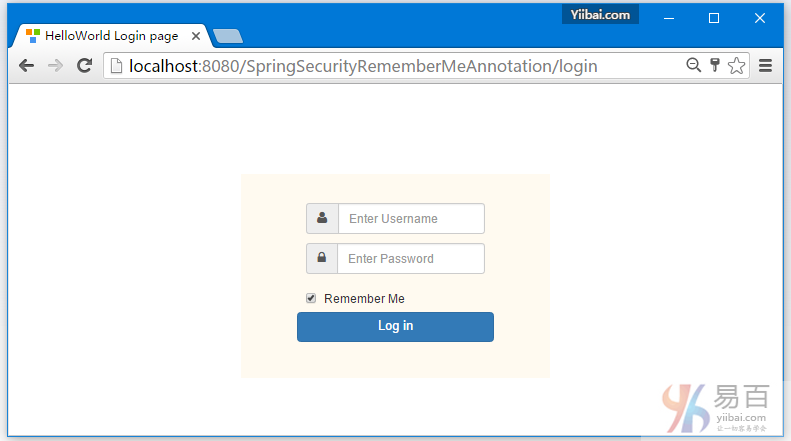
開啟瀏覽器並存取 - http://localhost:8080/SpringSecurityRememberMeAnnotation/admin
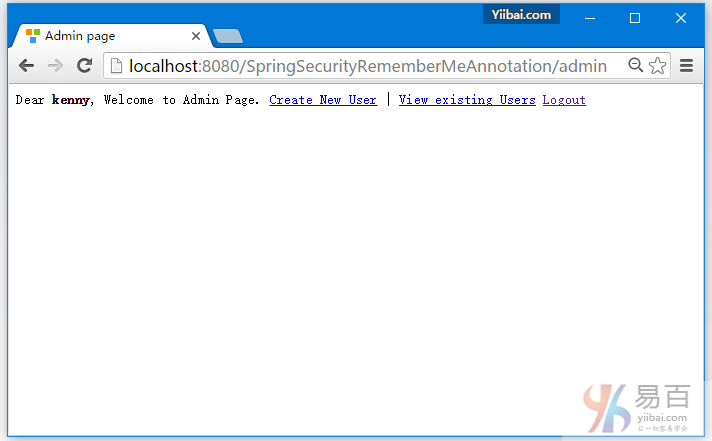
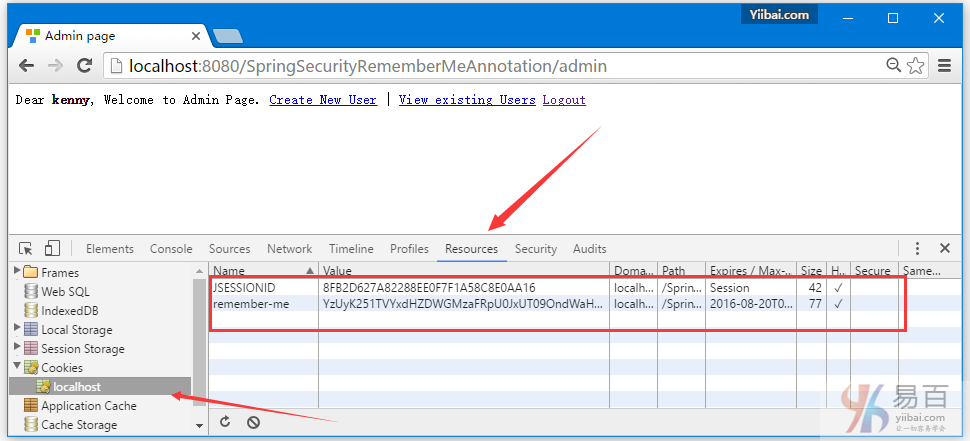
點選"記住我"(remember-me),檢視cookie詳細資訊。你可以看到 cookie 的有效期是一天(如在安全組態設定)。
現在退出登入,如下圖中所示 -
現在再試嘗試開啟:http://localhost:8080/SpringSecurityRememberMeAnnotation/admin,應該直接登入,而不再需要使用輸入使用者名和密碼登入。
下載原始碼
11-SpringSecurityRememberMeAnnotation.zip