iOS - Alerts(警示)
使用警示Alerts
警示(alert )是用來給使用者的重要資訊。只有 Alert 檢視中選擇該選項後,我們才能進一步使用的應用程式。
重要的屬性
-
alertViewStyle
-
cancelButtonIndex
-
delegate
-
message
-
numberOfButtons
-
title
重要的方法
- (NSInteger)addButtonWithTitle:(NSString *)title
- (NSString *)buttonTitleAtIndex:(NSInteger)buttonIndex
- (void)dismissWithClickedButtonIndex:
  (NSInteger)buttonIndex animated:(BOOL)animated
- (id)initWithTitle:(NSString *)title message:
  (NSString *)message delegate:(id)delegate
  cancelButtonTitle:(NSString *)cancelButtonTitle
  otherButtonTitles:(NSString*)otherButtonTitles, ...
- (void)show
更新ViewController.h“如下:
讓類符合加入警示(alert)檢視委託協定<UIAlertViewDelegate> ,在ViewController.h 如下圖所示:
#import <UIKit/UIKit.h>

@interface ViewController : UIViewController<UIAlertViewDelegate>{

}
@end
新增自定義的方法addAlertView
-(void)addAlertView{
    UIAlertView *alertView = [[UIAlertView alloc]initWithTitle:
    @"Title" message:@"This is a test alert" delegate:self
    cancelButtonTitle:@"Cancel" otherButtonTitles:@"Ok", nil];
    [alertView show];
}
實現警報檢視委託方法
#pragma mark - Alert view delegate
- (void)alertView:(UIAlertView *)alertView clickedButtonAtIndex:
  (NSInteger)buttonIndex{
    switch (buttonIndex) {
        case 0:
            NSLog(@"Cancel button clicked");
            break;
        case 1:
            NSLog(@"OK button clicked");
            break;

        default:
            break;
    }
}
更新在ViewController.m 中的 viewDidLoad 如下
(void)viewDidLoad
{
   [super viewDidLoad];
   [self addAlertView];
}
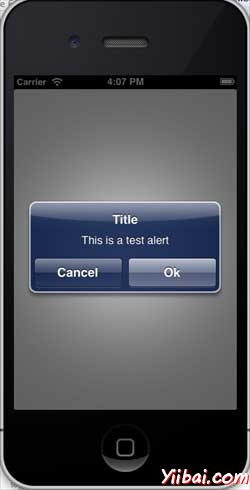
輸出
現在,當我們執行程式時,我們會得到下面的輸出。